
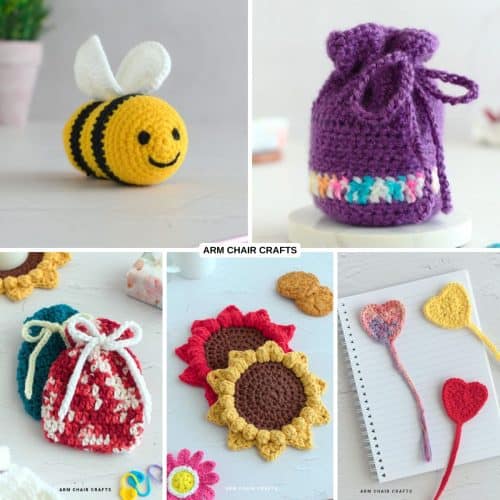
This crochet amigurumi bee is a sweet, beginner-friendly project that's perfect for spring crafts and handmade gifts.
Designed as a low sew pattern, it comes together quickly without complicated assembly, making it ideal for both new and experienced crocheters.
Small, cheerful, and full of personality, this little bee is great for decorating shelves, gifting to kids, or adding to seasonal displays.
If you're looking for a fun way to practice how to crochet amigurumi without feeling overwhelmed, this project is a charming place to start.

Exclusive PDF Patterns in the Recline and Unwind Club
Access ad-free, downloadable PDFs and our growing crochet pattern library by joining the Recline and Unwind Club!
Jump to:
- Why You'll Love This Pattern
- Materials Needed
- Skill Level
- Yarn and Hook Information
- Stitches and Abbreviations - US Terms
- Special Stitches
- Gauge
- Finished Size
- ⭐Get the PDF Version in the Recline and Unwind Club ⭐
- Instructions
- Crochet Tips, Yarn Choices, and Color Inspiration
- Perfect Occasions to Use This Craft
- How To Use This Craft
- FAQ
- More Crafts You Might Like To Try
- More Easy Patterns For You To Try
- Stay Connected
Amigurumi projects are loved for their personality, and this crochet amigurumi bee is no exception.
With its rounded shape, simple details, and low sew construction, it's a fun and approachable project that doesn't require advanced skills or hours of assembly.
Whether you're new to making crochet toys or just want a quick, feel-good project, this little bee is designed to be stress-free and enjoyable.
This crochet amigurumi bee is especially popular for spring crafts, Easter baskets, and handmade gift ideas. Its small size makes it quick to complete, while the minimal sewing keeps things beginner-friendly.
You can make one as a cute desk companion or create several bees to gift or display together.
If you're learning how to crochet amigurumi figures, this bee is a great introduction to shaping, stuffing, and finishing without complicated steps.

Why You'll Love This Pattern
- Beginner-friendly amigurumi project
- Low sew pattern with minimal assembly
- Quick to make and highly giftable
- Perfect for spring crafts and seasonal decor
- Great for practicing how to crochet small toys
- Cute, cheerful design with lots of personality
Materials Needed
Yarn
- #3 light milk cotton or cotton blend yarn with 12-13 Wraps Per Inch (WPI)*
- You will need yarn for:
- the body (e.g. yellow) about 0.25 ounces (7 grams),
- stripes (e.g. black) about 0.25 ounces (7 grams),
- and wings (e.g. white) about 0.20 ounces (6 grams).
Hook
- 2.5 mm hook
Other
- Yarn needle
- Fiberfill
- Scissors
*Wraps per inch (WPI) - this is a measure of yarn thickness. To measure WPI, count how many times the yarn wraps around a ruler in one inch. There are more wraps for thinner yarn and fewer wraps for thicker yarn.
Skill Level
Skill level: ★☆☆☆☆ - Beginner
Time estimate: Typically it took me about under 1 hour to make a crochet bee.
Yarn and Hook Information
I used milk cotton to make this amigurumi crochet bee. However, you could use acrylic yarn, an acrylic blend, or even 100% cotton to make it.
Stitches and Abbreviations - US Terms
- Ch - Chain
- St/s - Stitch/es
- Sc - Single Crochet
- Sc2tog - Single Crochet Two Together (see special stitches below)
- Col - Color
- FO - Fasten Off
- [ ] at the end of each row indicates how many stitches are needed in that row.
Special Stitches
Sc2tog
Sc2tog (Single Crochet Two Together) is a decrease stitch used in crochet to reduce the number of stitches.
How to Do sc2tog:
- Insert your hook into the first stitch.
- Yarn over and pull up a loop (2 loops on hook).
- Insert hook into the next stitch.
- Yarn over and pull up another loop (3 loops on hook).
- Yarn over again and pull through all 3 loops.
Gauge
Gauge is not too important for this crochet amigurumi bee project.
Finished Size

The finished size of this amigurumi bee is about 3 inches x 2 inches (7.5 cm x 5 cm).
⭐Get the PDF Version in the Recline and Unwind Club ⭐
This pattern is available as an ad-free, downloadable PDF in the Recline and Unwind Club.
Prefer not to commit? You can also purchase it individually in the shop.
Join today to get full instructions, helpful tips, and access to our growing pattern library.
Copyright Notice
This pattern and its contents are protected by copyright law. It may not be copied, altered, redistributed, resold, translated, or used to produce photo or video tutorials in any format, either in whole or in part.
You are permitted to sell finished items made using this pattern. However, the written pattern itself may not be sold, shared, or distributed in any form. When marketing or displaying your finished items, please photograph your own work and refrain from using any of my original images.
Sharing Guidelines For Roundups - Bloggers you are welcome to include this pattern in roundup posts as a link, as long as you use one photo and link directly (with a do follow link) back to the original post. For full details, please refer to my Terms of Use page.
Instructions
- Col A - Main color, e.g. yellow
- Col B - Stripe color, e.g. black
- Col C - Wing color, e.g. white
Making the Bee Body
You will be working in continuous rounds.
Round 1: Col A, Make a magic ring and ch1 (doesn't count as a st), then make 6 sc into the magic ring. Pull the yarn tail tight to close the ring. [6 sc].
Round 2: 2 sc in each st around. [12 sc].
Round 3: *1 sc in 1st st, 2 sc in next st,* repeat from * 6 times. [18 sc].
Round 4: *1 sc in each of the next 2 sts, 2 sc in next st,* repeat from * 6 times. [24 sc].
Round 5: *1 sc in each of the next 3 sts, 2 sc in next st,* repeat from * 6 times. [30 sc].
You're almost there!
To unlock the final steps and complete your pattern, create a free account with Grow.me. below.
Make sure you tick the box to subscribe to our newsletter and stay up to date with the latest patterns, tips, and more!
Once you're signed up, you'll get instant access to finish your project and enjoy exclusive content in the future.
Already signed up? Hit the button below and select 'Switch to Log In' to pick up where you left off and finish your project!
Round 6: *1 sc in each of the next 4 sts, 2 sc in next st,* repeat from * 6 times. [36 sc].
Round 7 - 9: 1 sc in each st around. [36 sc in each round].
Round 10: Col B, 1 sc in each st around. [36 sc].
Round 11 - 12: 1 sc in each st around. [36 sc in each round].
Round 13: Col A, 1 sc in each st around. [36 sc].
Round 14 - 15: 1 sc in each st around. [36 sc in each round].
Round 16: Col B, 1 sc in each st around. [36 sc].
Round 17 - 18: 1 sc in each st around. [36 sc in each around].
Round 19: Col A, 1 sc in each st around. [36 sc].
Round 20 - 21: 1 sc in each st around. [36 sc in each around].
Round 22: *1 sc in each of the next 4 sts, sc2tog,* repeat from * 6 times. [30 sc].
Round 23: *1 sc in each of the next 3 sts, sc2tog*, repeat from * 6 times. [24 sc].
Round 24: *1 sc in each of the next 2 sts, sc2tog*, repeat from * 6 times. [18 sc].
Fill your bee body with fiber fill.
Round 25: *1 sc in next st, sc2tog*, repeat from * 6 times. [12 sc].
Round 26: Col B, sc2tog 6 times. FO [6 sc].
Completed bee body.

Making the wings
Make 2 wings
You will be working in continuous rounds.
Round 1: Col C, make a make ring, ch 1 (doesn't count as a st), make 8 sc into the ring. [8 sc].
Round 2: 2 sc in each sts around. [16 sc].
Round 3: *1 sc in next st, 2 sc in next st*, repeat from * 8 times [24 sc].
Round 4: *1 sc in next st, 2 sc in next st,* repeat from * 12 times. [36 sc].
Round 5: 1 sc in each of the next 36 sts. Completed one wing. Fasten off, but leave a long tail that is at least 6 inches (15 cm) long. You will use this tail to sew the wing into the body. [36 sc].
Repeat wing instructions to make another. You should have 2 wings.

Putting the Bee together
Thread one of the wing tails onto a yarn needle, then attach to the top of the bee as you like.
Using Col A, thread it onto a yarn needle and embroider some eyes and a mouth onto your bee's face. I recommend placing the eyes on round 3.
Looking for your next crochet project?
Explore the Recline and Unwind Club PDF library for exclusive ad-free crochet patterns, tips, and shop.
Crochet Tips, Yarn Choices, and Color Inspiration
- Use stitch markers to keep track of rounds
- Stuff firmly but gently for a smooth shape
- Classic yellow and black for a traditional bee
- Pastel colors for spring or baby gifts
- Add blush details for extra cuteness
- Make larger or smaller bees by adjusting yarn size
- Turn it into a keychain or ornament with a loop
Perfect Occasions to Use This Craft
- Add to spring or Easter-themed decor.
- Gift as a handmade toy or keepsake.
- Include in baby showers or gift baskets.
- Use as classroom or craft group projects.
- Sell or gift as a small crochet plush item.
How To Use This Craft
- Display on desks, shelves, or seasonal decor trays.
- Gift as a cute handmade surprise.
- Use as a beginner-friendly amigurumi practice piece.
- Create sets for spring markets or fairs.
- Add to gift wrapping as a decorative topper.
FAQ
Absolutely. It's a great introduction to shaping and stuffing.
Yes, changing yarn weight or colors easily customizes the bee.
Yes, crochet amigurumi bees are especially popular for spring crafts and gifts.

More Easy Patterns For You To Try
Looking for more patterns like this? Why not try one of these:
Stay Connected
Made this pattern? Let us know how it went in the comments below!
Pin this post - Pin now to take your paper crafting skills to the next level.
Share on Instagram or Facebook - Capture the beauty of your finished paper craft project and share it on Instagram or Facebook! Tag us @armchaircrafts so we can see your work!


