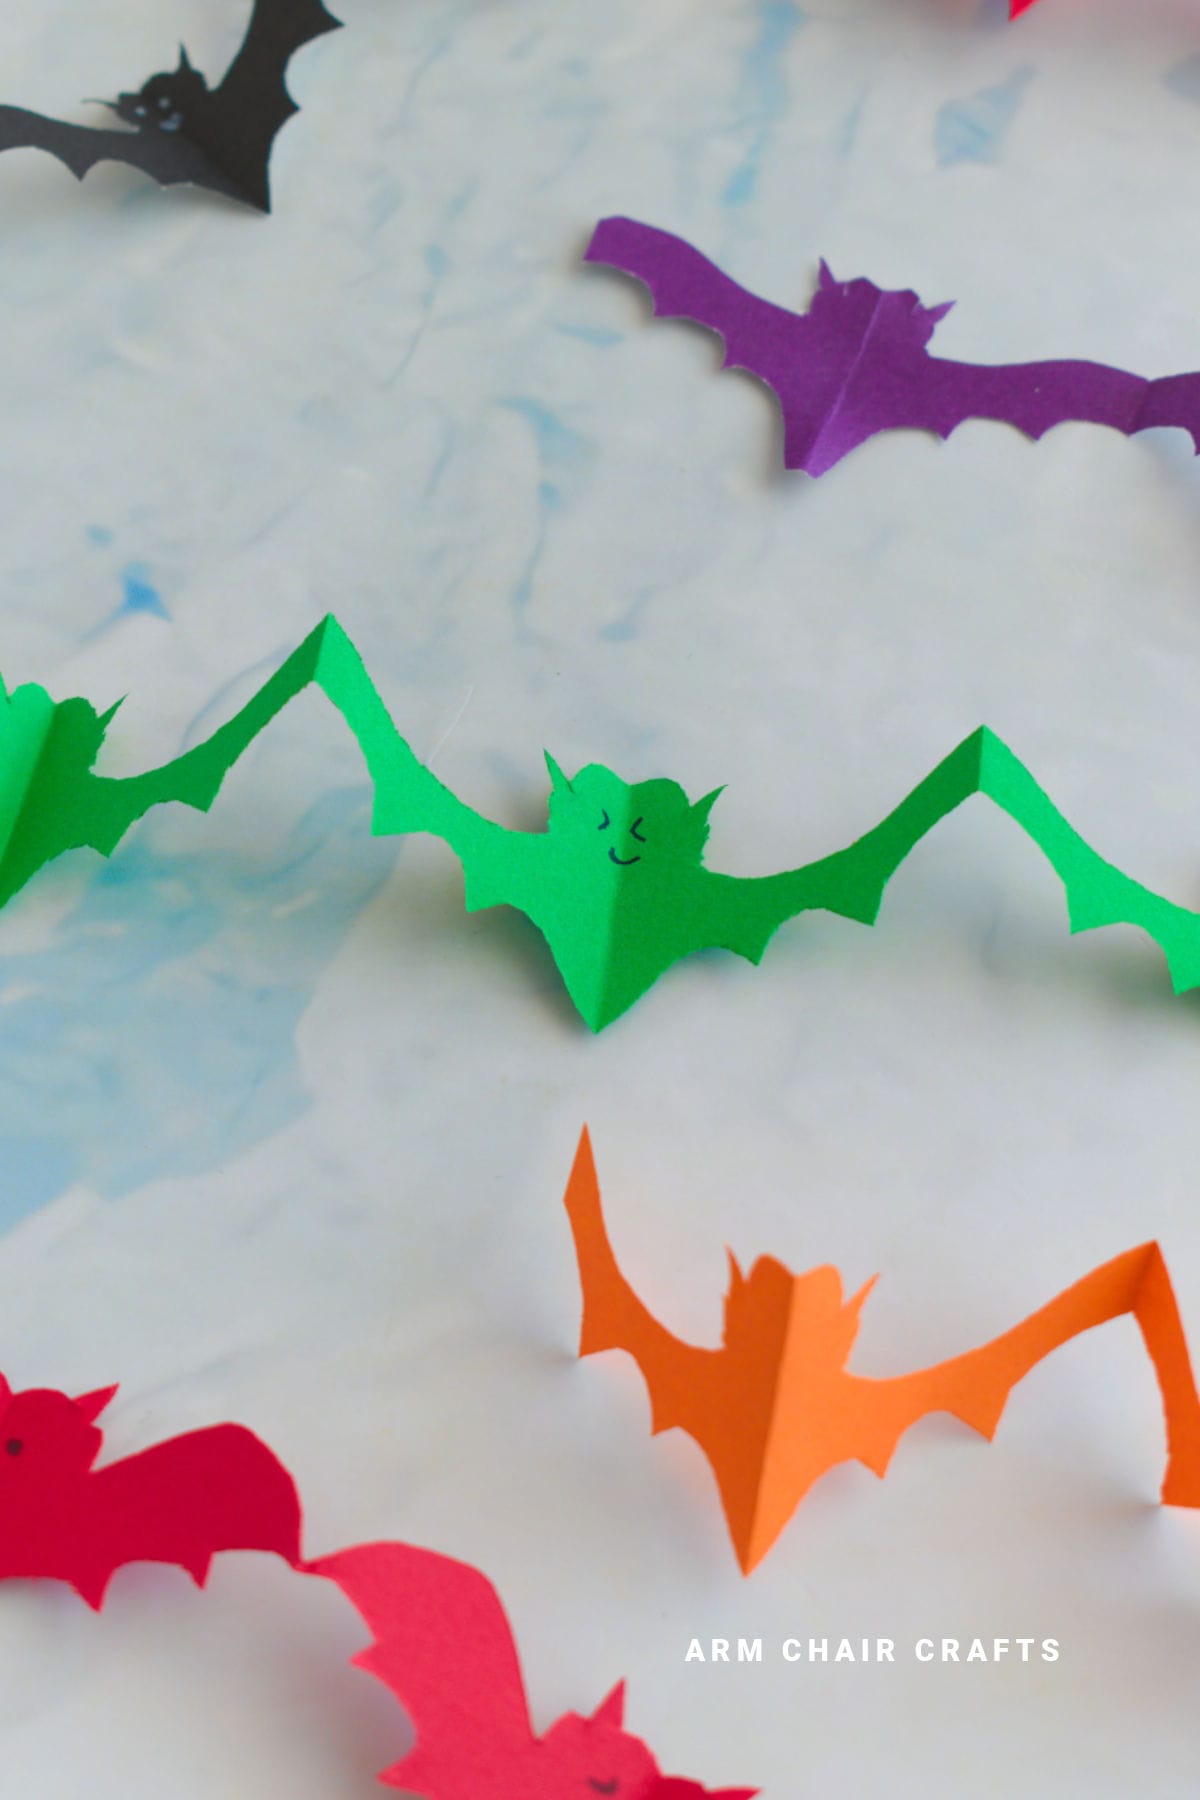
Bring Halloween to life with an easy paper bat chain - a festive decoration you can make in minutes using only paper, scissors, and a pencil.
Perfect for doorways, walls, or party backdrops, this beginner-friendly craft is fun for kids and adults alike.
Jump to:
Halloween decorations don't have to be expensive or complicated. Sometimes the simplest paper crafts give you the biggest effect, especially when you can make them in batches.
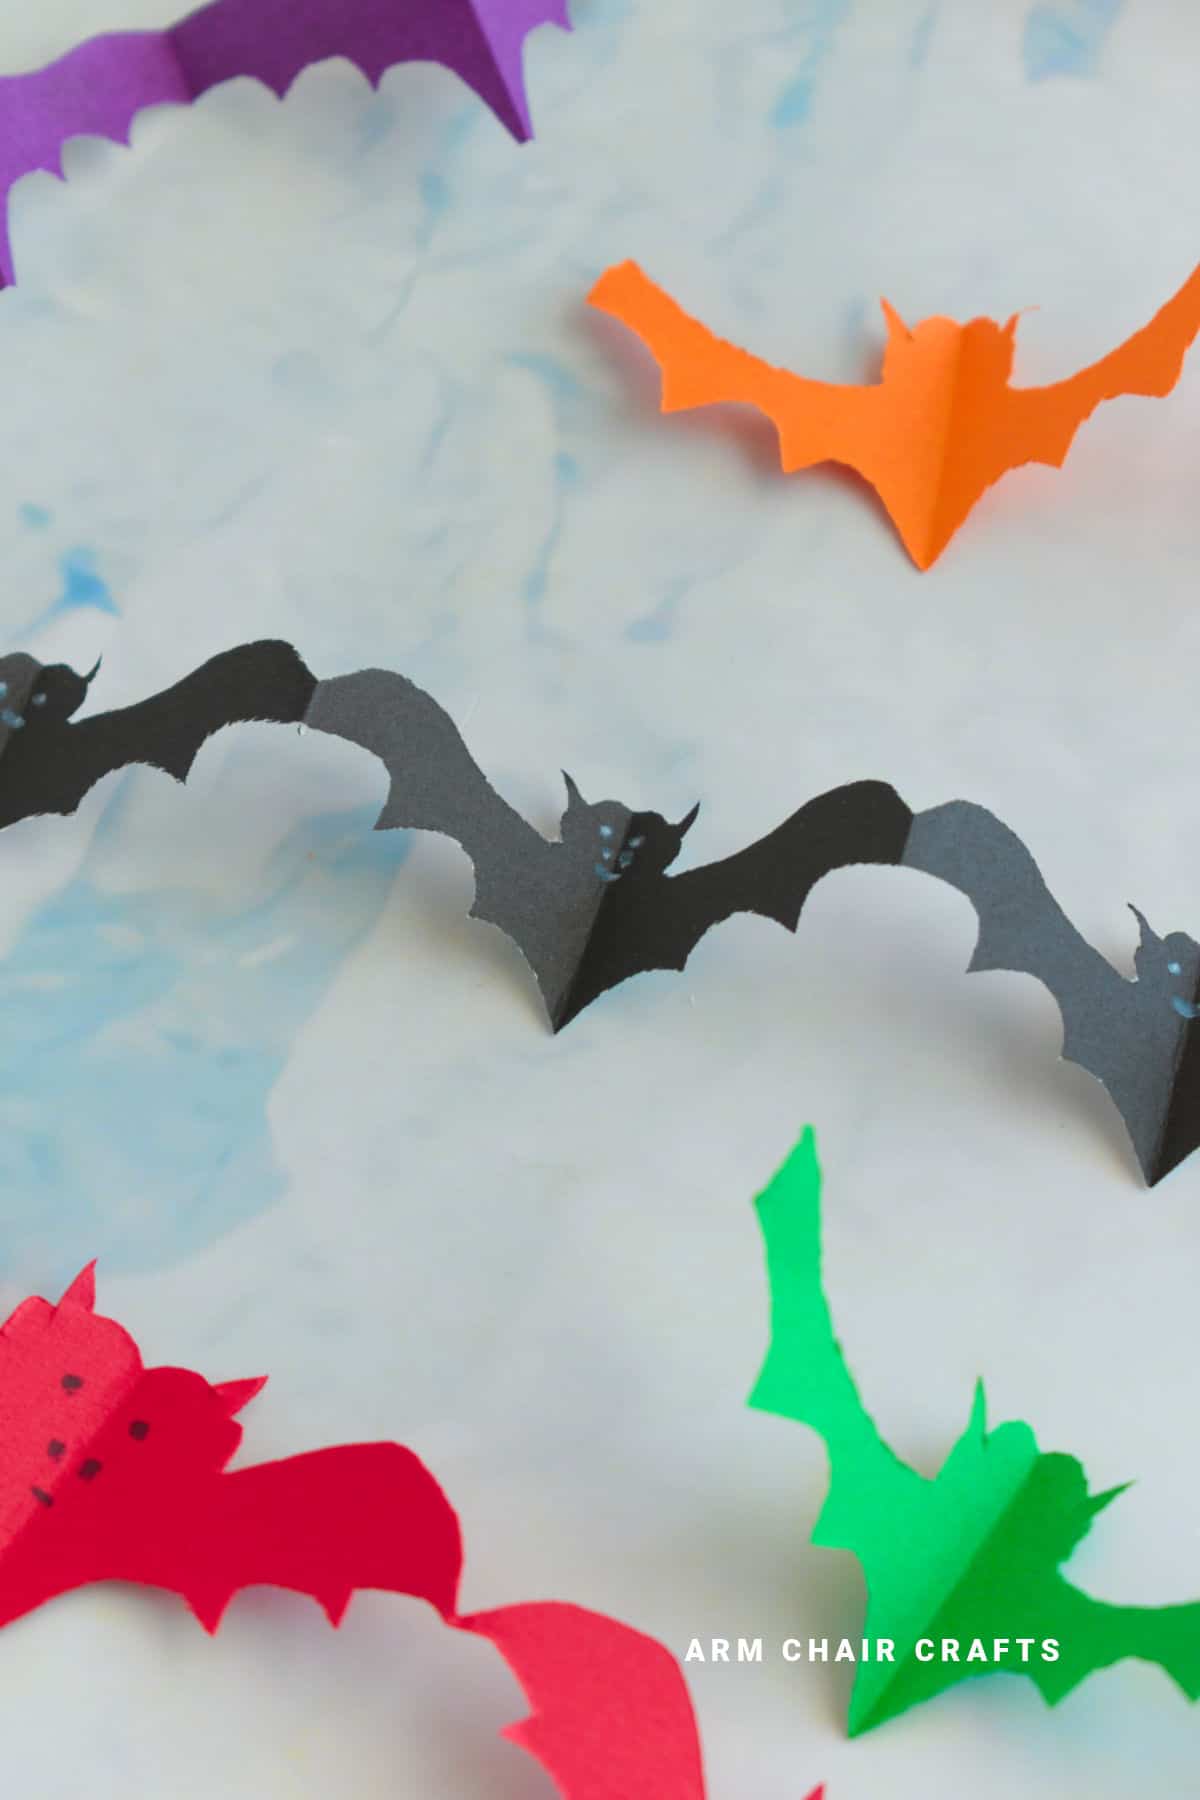
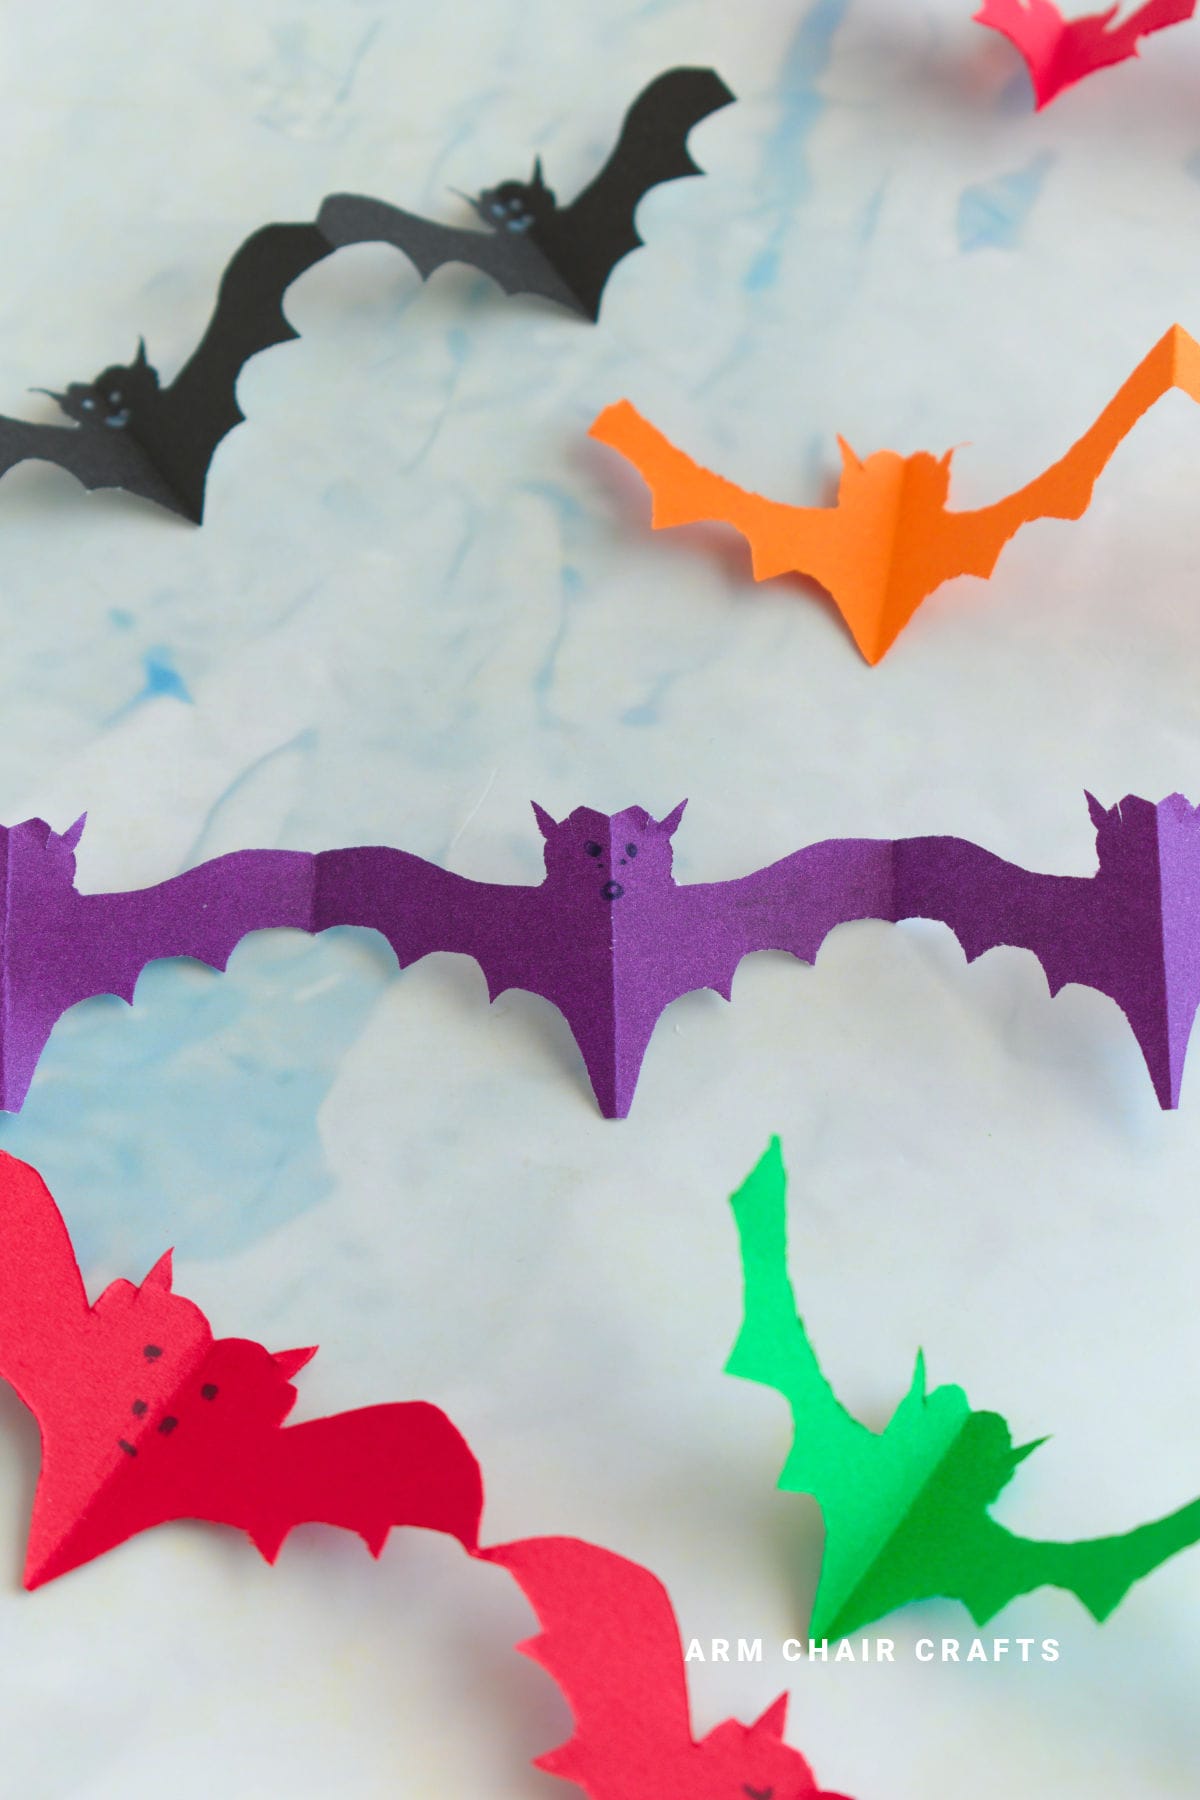
An easy paper bat chain is the perfect example: by folding a long strip of paper accordion-style, tracing a bat shape, and cutting it out, you'll create a string of connected bats that's instantly eye-catching when you open it up.
What makes this project especially appealing is its versatility. You can hang your easy paper bat chain across a mantel, tape it around a doorway, or drape it over a party table for instant atmosphere.
It's quick enough to make a single chain in under 15 minutes, but once you see how striking it looks, you may find yourself folding and cutting several chains to layer together.
And because it uses basic supplies you probably already have at home, it's an accessible craft for classrooms, family nights, or last-minute Halloween prep.
Why You'll Love This Pattern
- Only needs paper, scissors, and a pencil - simple and affordable
- The accordion fold and cut method makes it beginner-friendly
- Perfect for decorating large spaces on a budget
- Easy to scale up by making several chains and joining them together
- A fun project for kids, classrooms, or family Halloween nights
- A great last minute craft
Materials Needed
- Long strip of black paper (construction paper or cardstock works well)
- Pencil
- Scissors
- Optional: tape or string for hanging, glitter or markers for decorating
Instructions
For this DIY bat paper chain garland, you will need a strip of paper. You could fold a piece of A4 paper in half lengthwise and then cut it to form 2 strips. Or, if you want smaller paper chains, you could use a strip that is about 2 inches (5 cm) wide and as long as you like. Ideally, the longer the change, the more bats it will make. The wider the chain, the bigger your bats will be.
If you don't have long paper, after making a few chains, you can glue them together or even punch a hole on either end and attach it with string to another bat garland to form a longer paper chain.
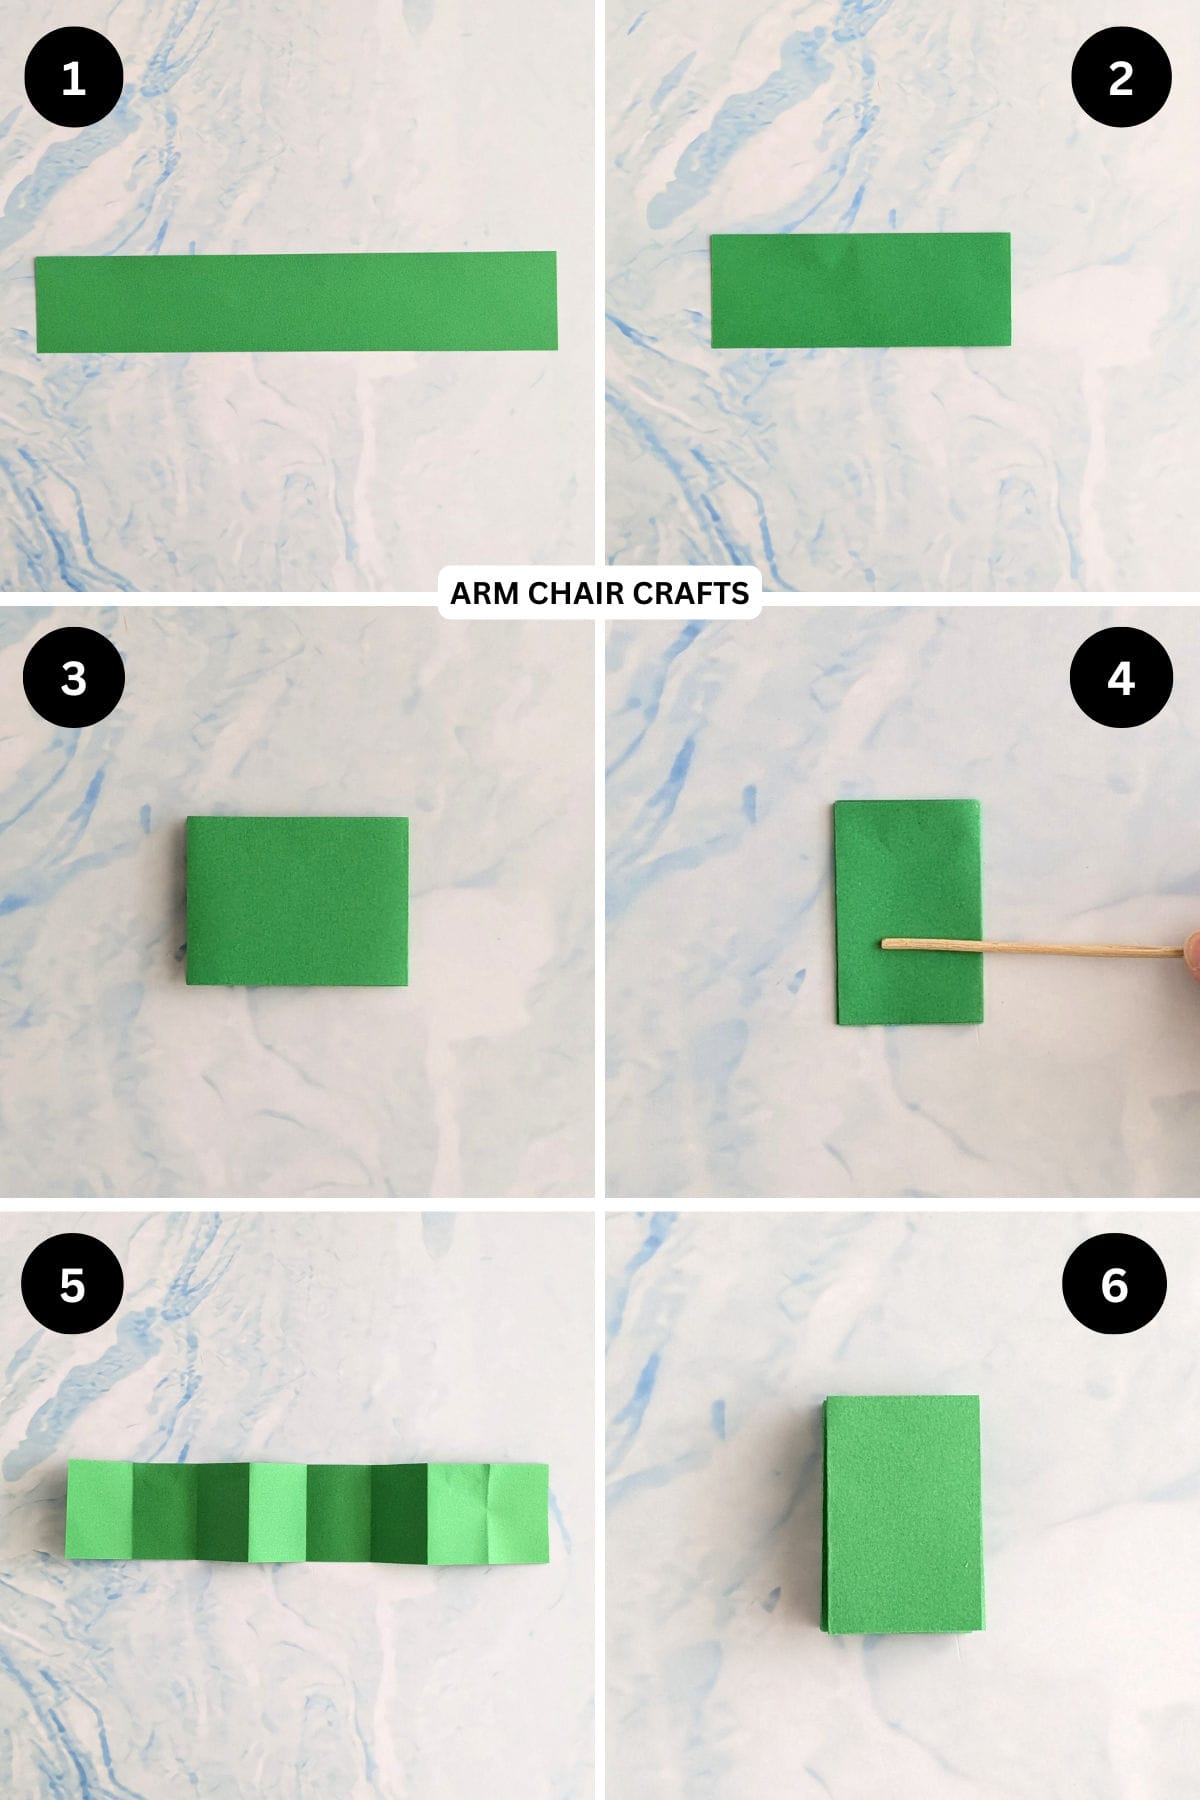
Step 1: Start with your paper strip sitting horizontally.
Step 2: Fold the right edge to meet the left edge, to fold the paper in half.
Step 3: Once again, fold the right edge to meet the left edge.
Step 4: Depending on the length of the paper, fold your paper in half from right to left again. The final fold will determine how wide your bat will be. So, make sure you have at least 1 - 1.5 inches (2.5 cm to 3 cm) left after you fold it.
Step 5: Unfold the paper completely.
Step 6: Accordion fold the paper along the existing crease lines.
You're almost there!
To unlock the final steps and complete your pattern, create a free account with Grow.me. below.
Make sure you tick the box to subscribe to our newsletter and stay up to date with the latest patterns, tips, and more!
Once you're signed up, you'll get instant access to finish your project and enjoy exclusive content in the future.
Already signed up? Hit the button below and select 'Switch to Log In' to pick up where you left off and finish your project!
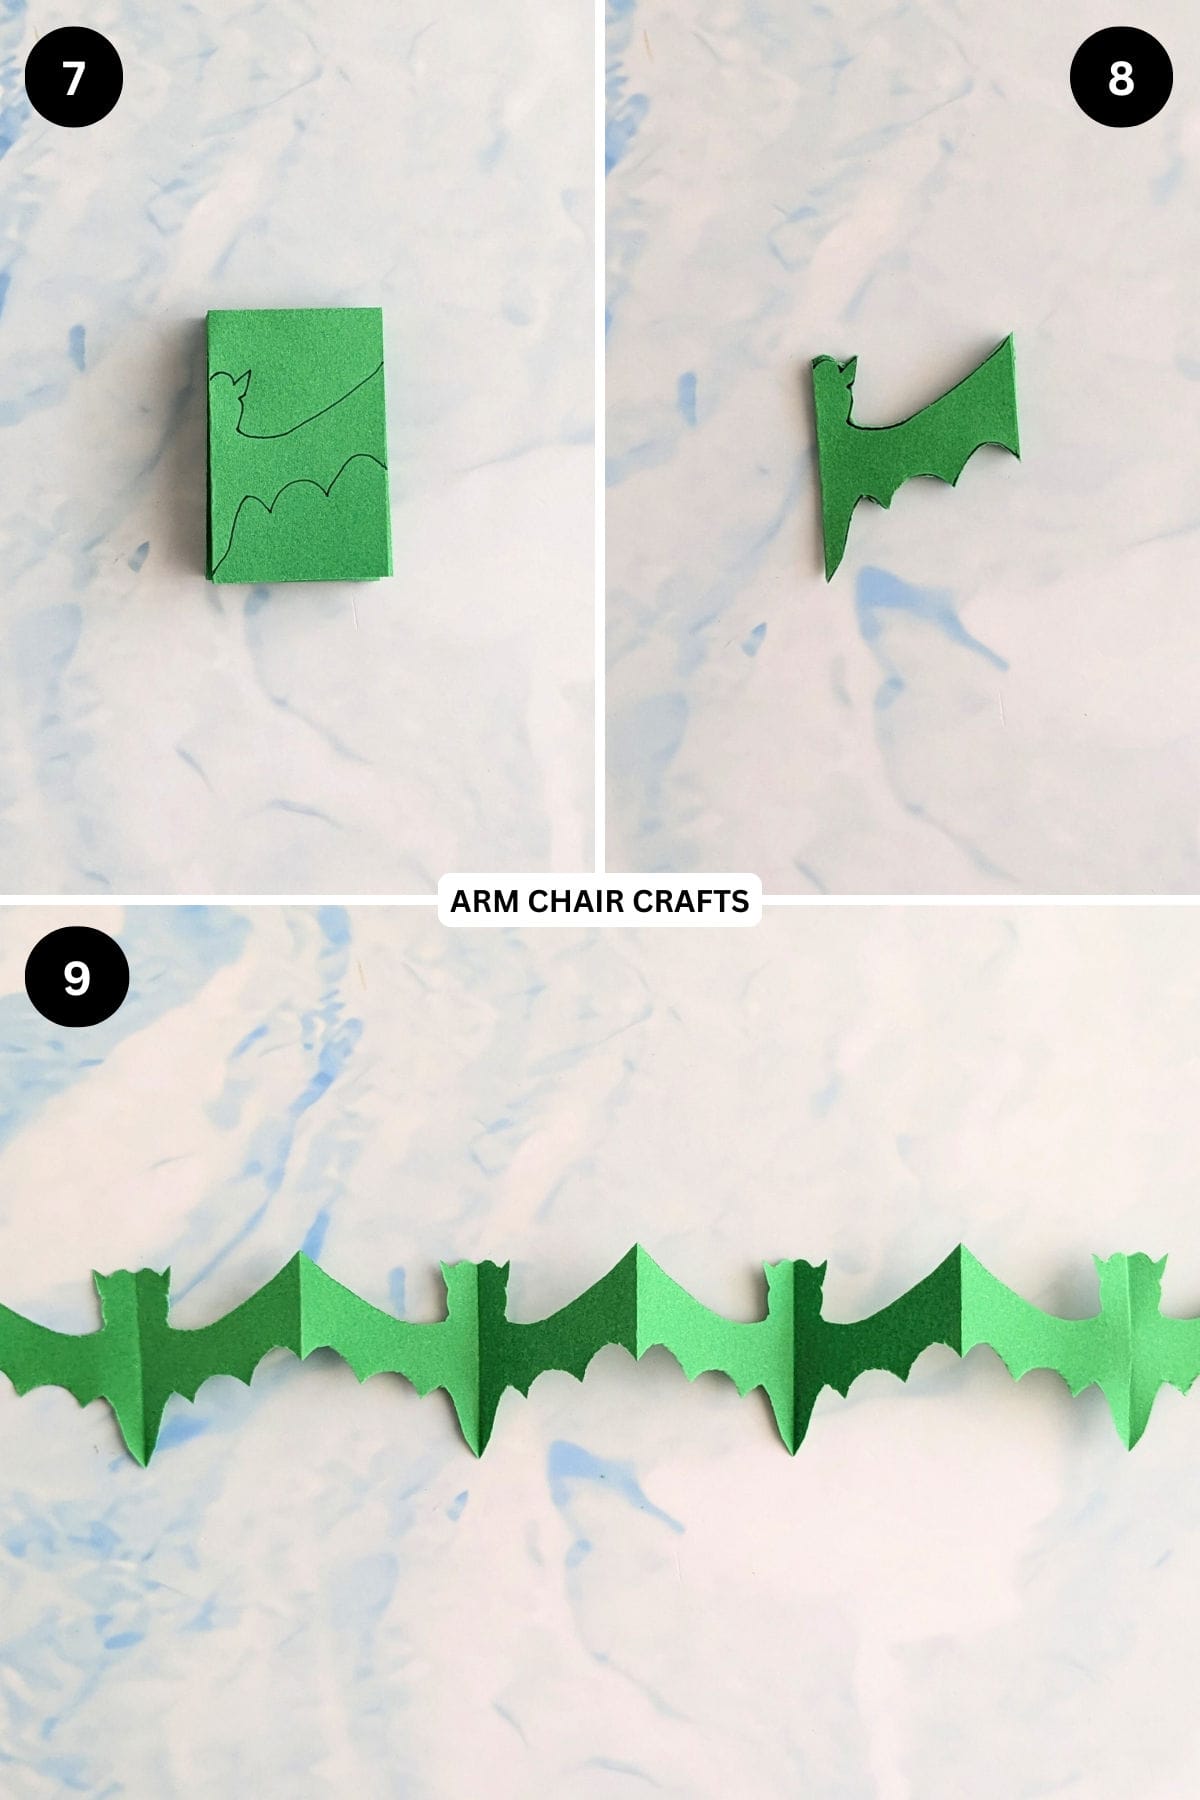
Step 7: Draw the outline of a bat. It is important that the side with the wings has enough width when drawn. This is because both the body of the bat and the wings will hold the paper chain together.
Step 8: Cut out your bat.
Step 9: Carefully unfold your bat. Completed bat chain. Decorate your bats as you like! If you want to hang the garland, you can punch a hole on the ends of the paper bat garland and attach some string.
Tips For Success
- Keep your accordion folds even so the bats line up neatly when cut.
- When tracing the bat, make sure the wings reach the edges of the folded paper so the bats stay connected once opened.
- Test your bat shape on a scrap of paper first before cutting into your folded strip.
- If you'd like a sturdier chain, use construction paper instead of thin printer paper.
- If you want a really long bat paper chain but don't have long paper - consider using parchment paper.
Color, Paper Ideas, and Variations
- Classic black: The traditional choice that always looks great against white walls.
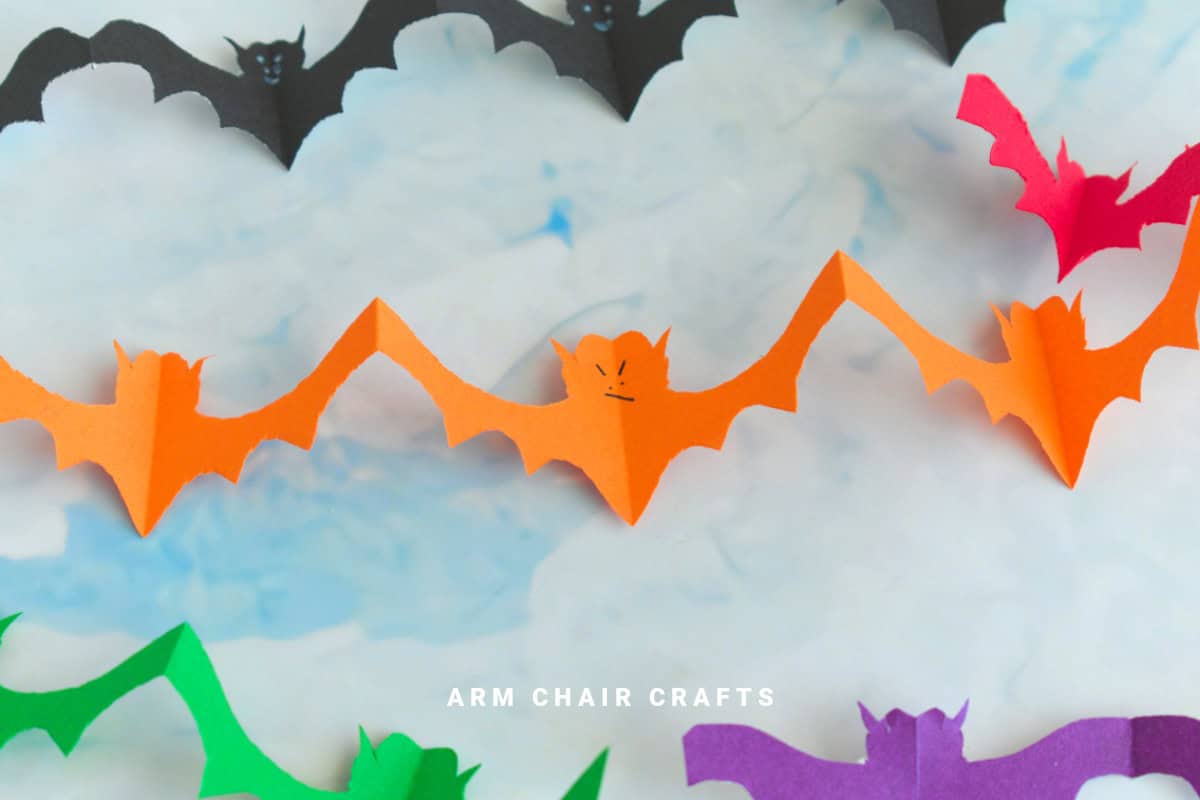
- Playful purple and orange: Alternate chains in Halloween colors for a vibrant party backdrop.
- Glitter bats: Use glitter paper or add glitter glue accents for a sparkly effect.
- White ghost chain: Use the same accordion technique but trace a ghost outline instead of bats.
- Mini bats: Make shorter chains from narrower strips of paper to decorate smaller spaces or table edges.
FAQ
About 10-15 minutes for one chain, depending on the length of your paper strip.
Black construction paper is sturdy but still easy to cut. Regular printer paper works too, especially for practice.
Yes - just start with a longer strip of paper or tape several finished chains together. If you want a longer chain but don't have long paper, you can glue the finished chains together, or join them with some string.
Other Easy Crafts You Might Like To Try:
Stay Connected
Made this pattern? Let us know how it went in the comments below!
Pin this post - Pin now to take your paper crafting skills to the next level.
Share on Instagram or Facebook - Capture the beauty of your finished paper craft project and share it on Instagram or Facebook! Tag us @armchaircrafts so we can see your work!