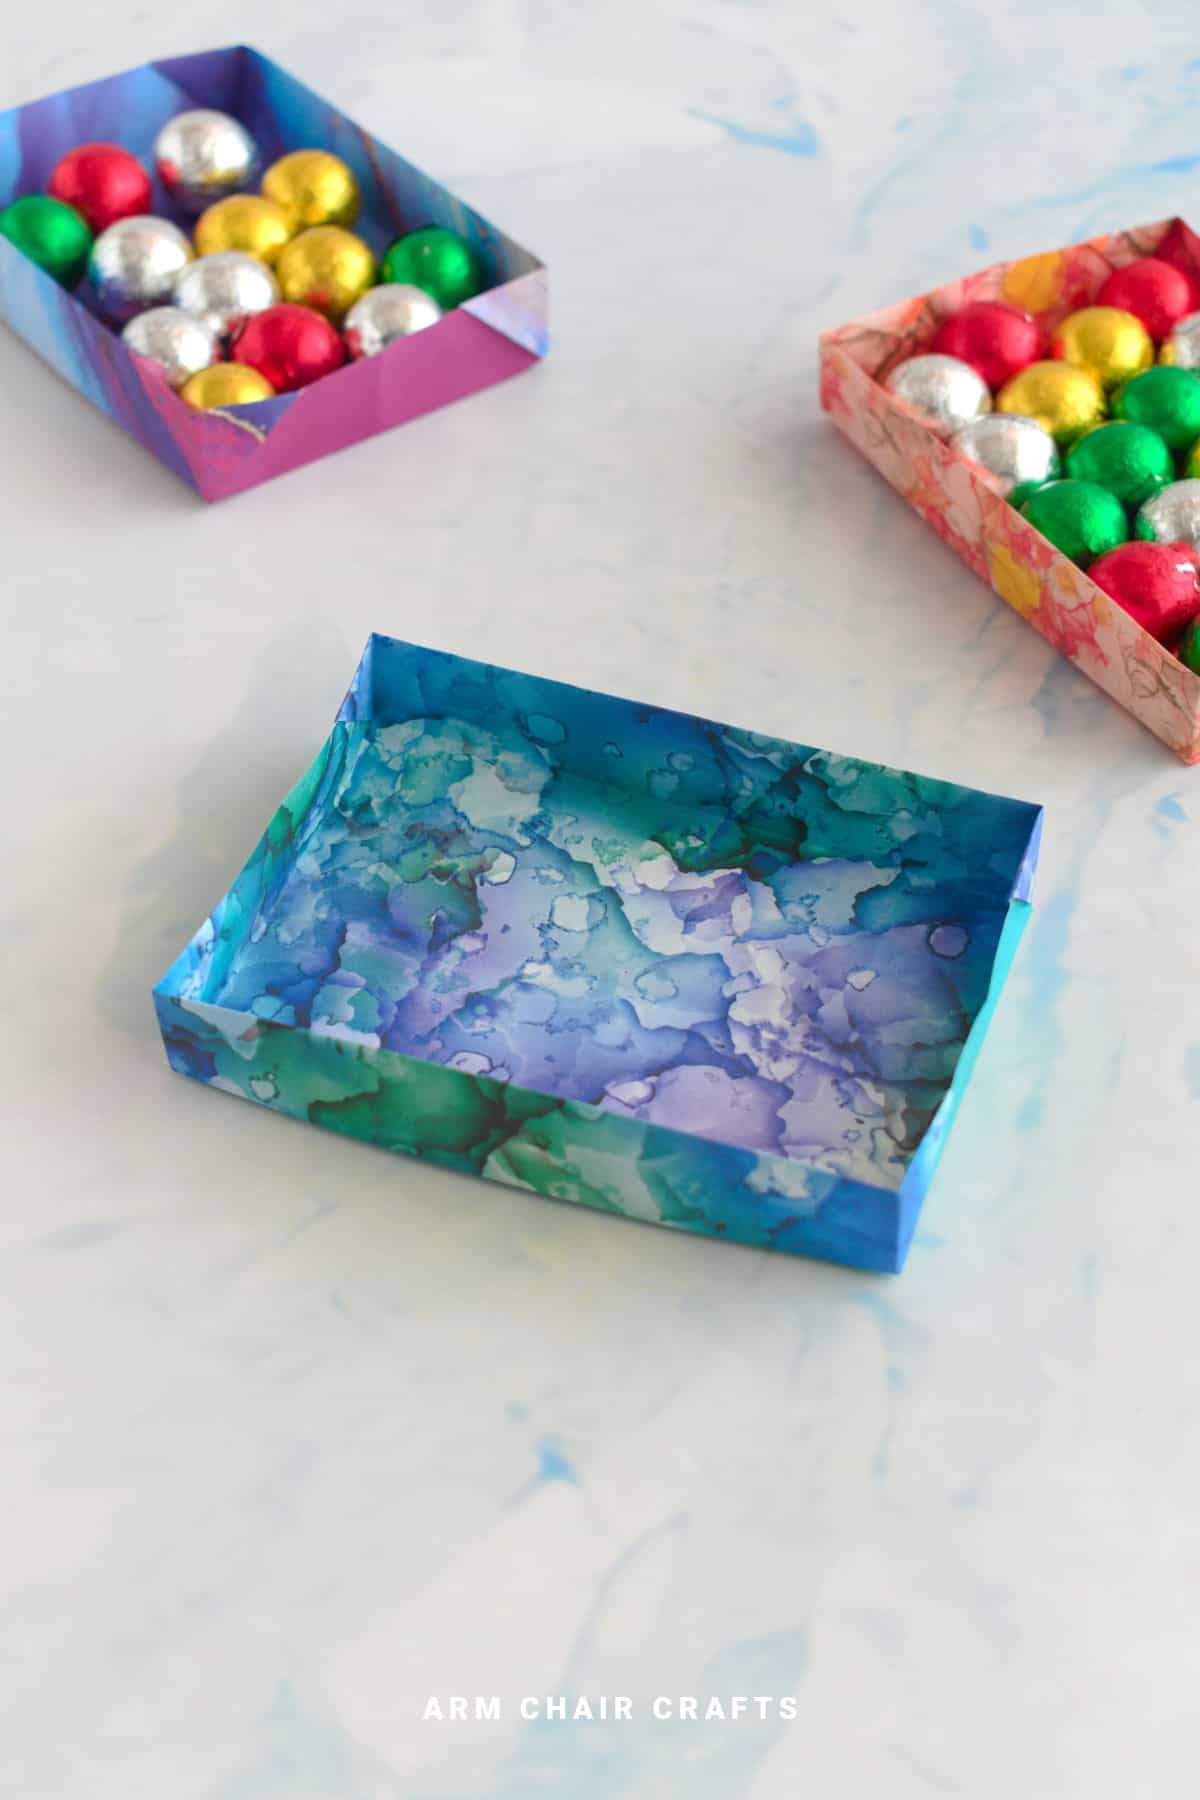
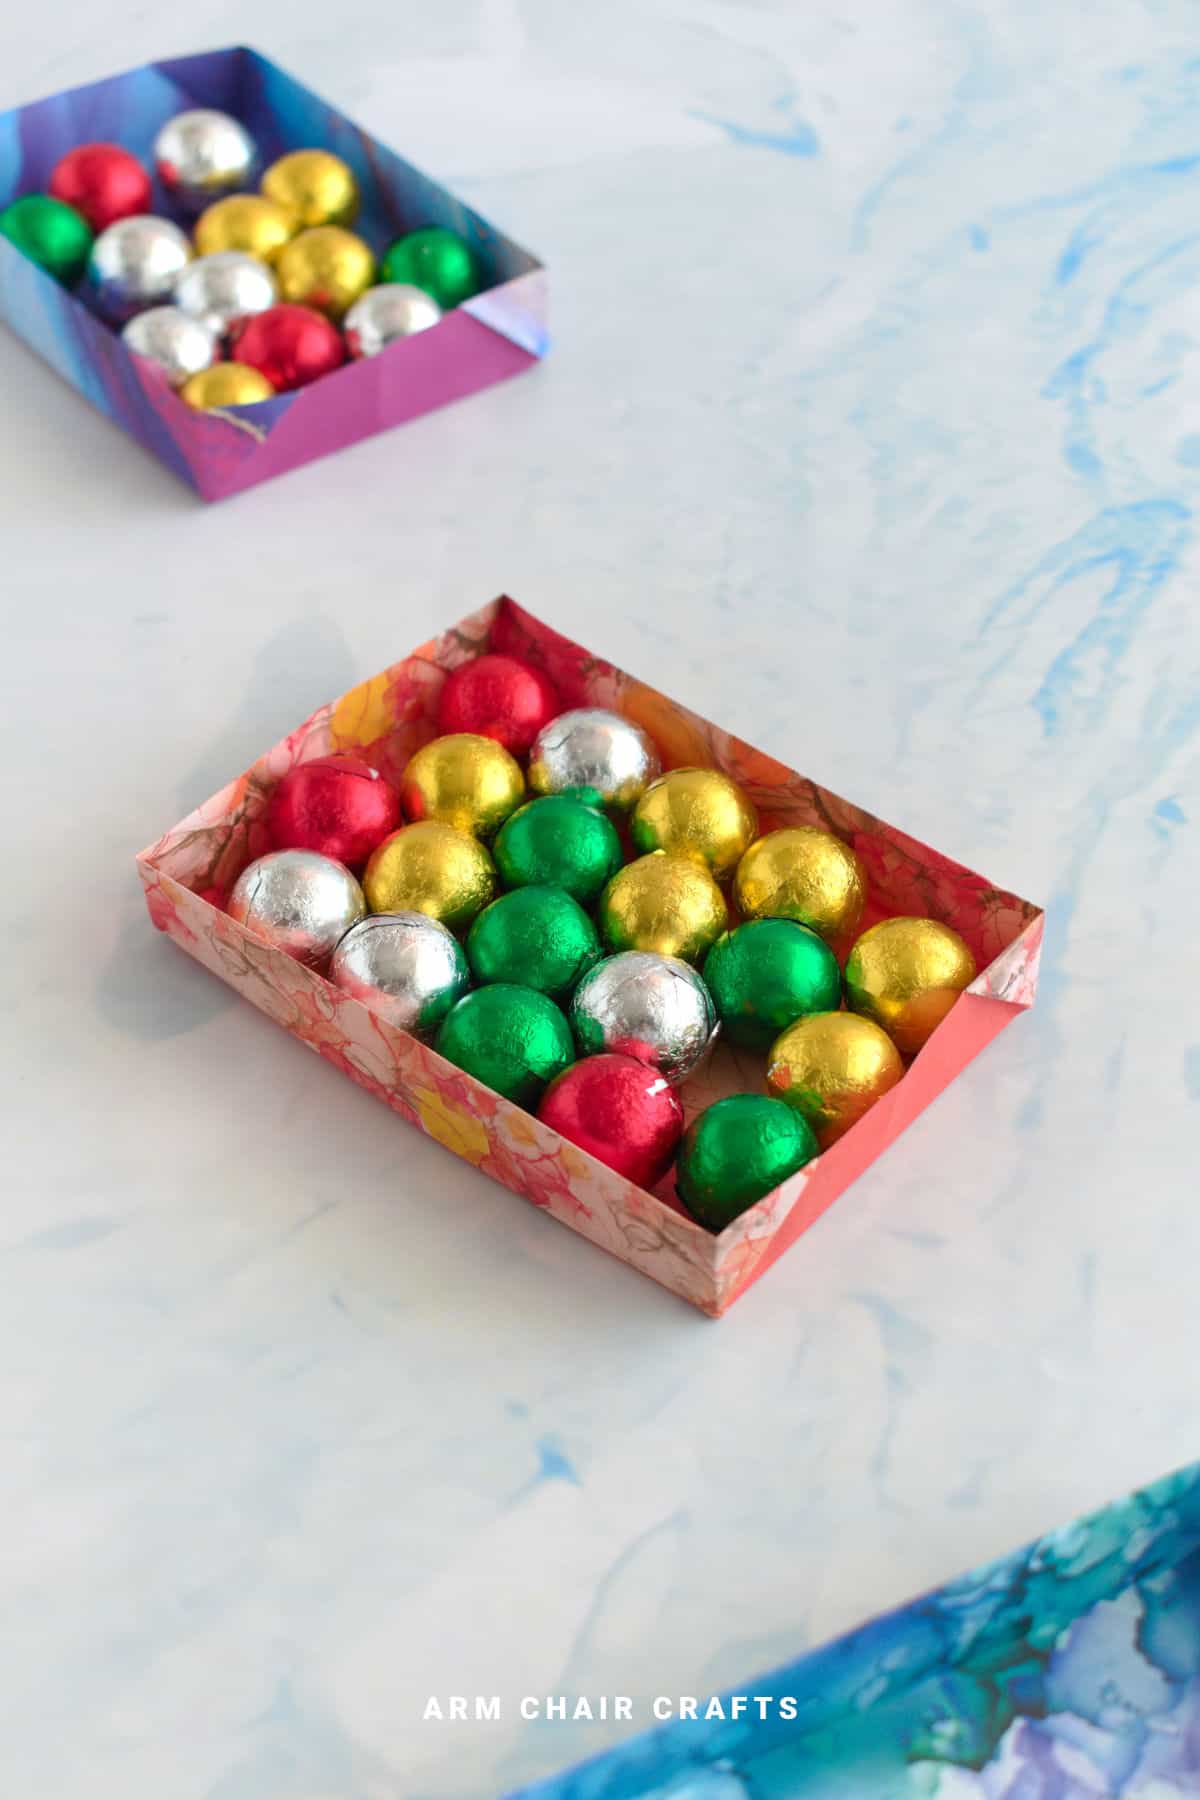
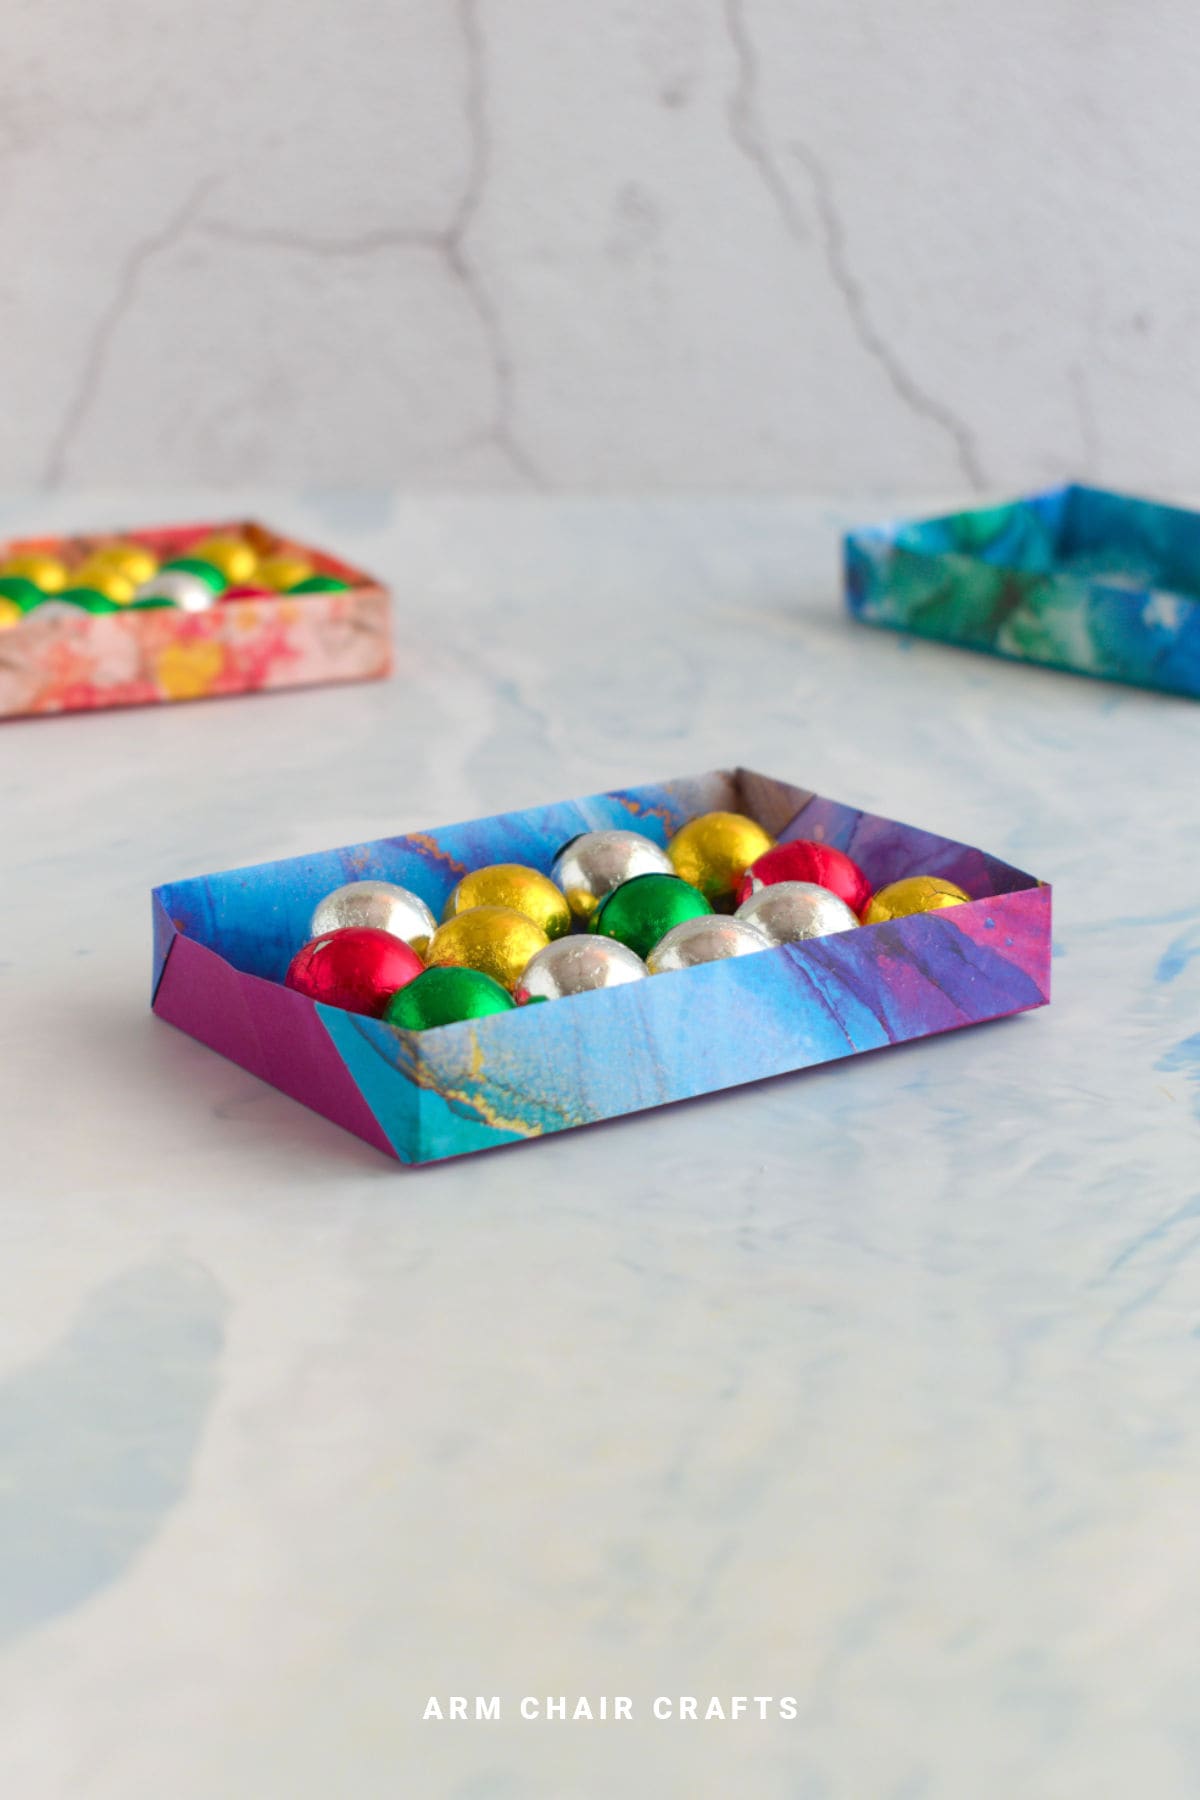
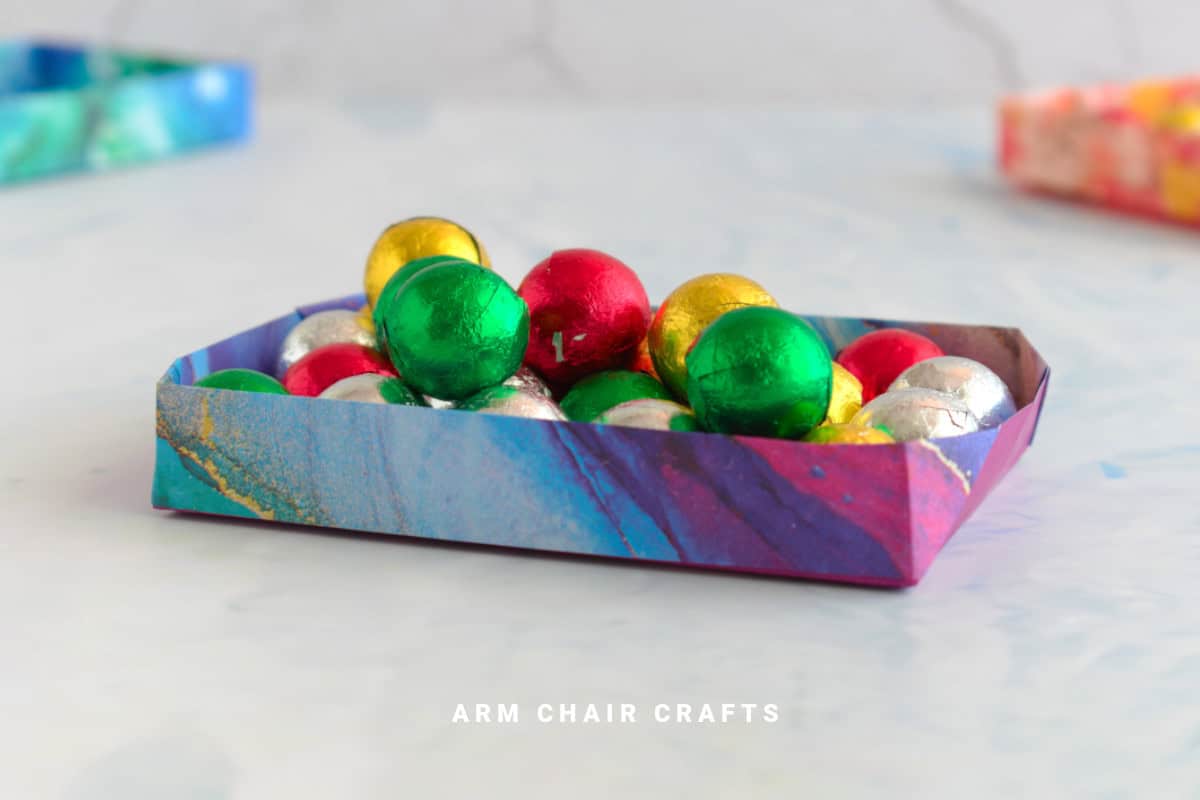
An origami tray is a quick and clever way to fold a single sheet of paper into a neat little container.
Perfect for holding wrapped candies, cookies, or party snacks, this fold is simple, sturdy, and requires no glue at all.
Jump to:
If you've ever found yourself wishing for a small dish to hold cookies, candies, or even tea bags, origami has a solution for you.
With just one sheet of square paper, you can fold an origami tray that looks tidy and surprisingly strong for its simplicity.
While it's not meant for anything greasy or wet, this tray is wonderful for dry foods like wrapped chocolates, mints, or crackers, and it also works beautifully as a decorative catchall for little household items.
One of the best things about making an origami tray is its versatility. Fold one in classic white paper and it looks elegant on a dessert table; use bright patterned paper and you'll have a playful accent for a party.
Because you don't need glue or tape, the tray holds its shape entirely through the folds, making it a great introduction to functional origami.
And since it starts with a square sheet, you can scale the size up or down depending on what you'd like to serve or display.
It's a handy, inexpensive project that feels a little magical - turning a flat sheet into something useful in just a few minutes.
Why You'll Love This Pattern
- Only requires one square sheet of paper - no glue or tools needed
- Beginner-friendly fold that looks neat and practical
- Scales easily: make a small tray for mints or a larger one for cookies
- Perfect for parties, snack tables, or gifting small treats
- An origami tray doubles as decoration and a functional container
Materials Needed
1 square sheet of paper (origami paper, scrapbook paper, or any patterned paper you like)
An origami tray made with 6 inch x 6 inch (15 cm x 15 cm) paper makes a tray that is about 4 inches x 3 inches (11 cm x 8 cm).
Instructions
Step 1: Start with the color you want on the inside of your tray facing up. In this case, we will be making the inside of our tray purple and the outside will be green.
Step 2: Fold the paper in half from top to bottom.
Step 3: Unfold previous step.
Step 4: Fold both the bottom edge and top edge in to meet the crease you made in the previous step.
Step 5: Fold those same edges back out to meet the top and bottom outside edges.
Step 6: Unfold previous step.
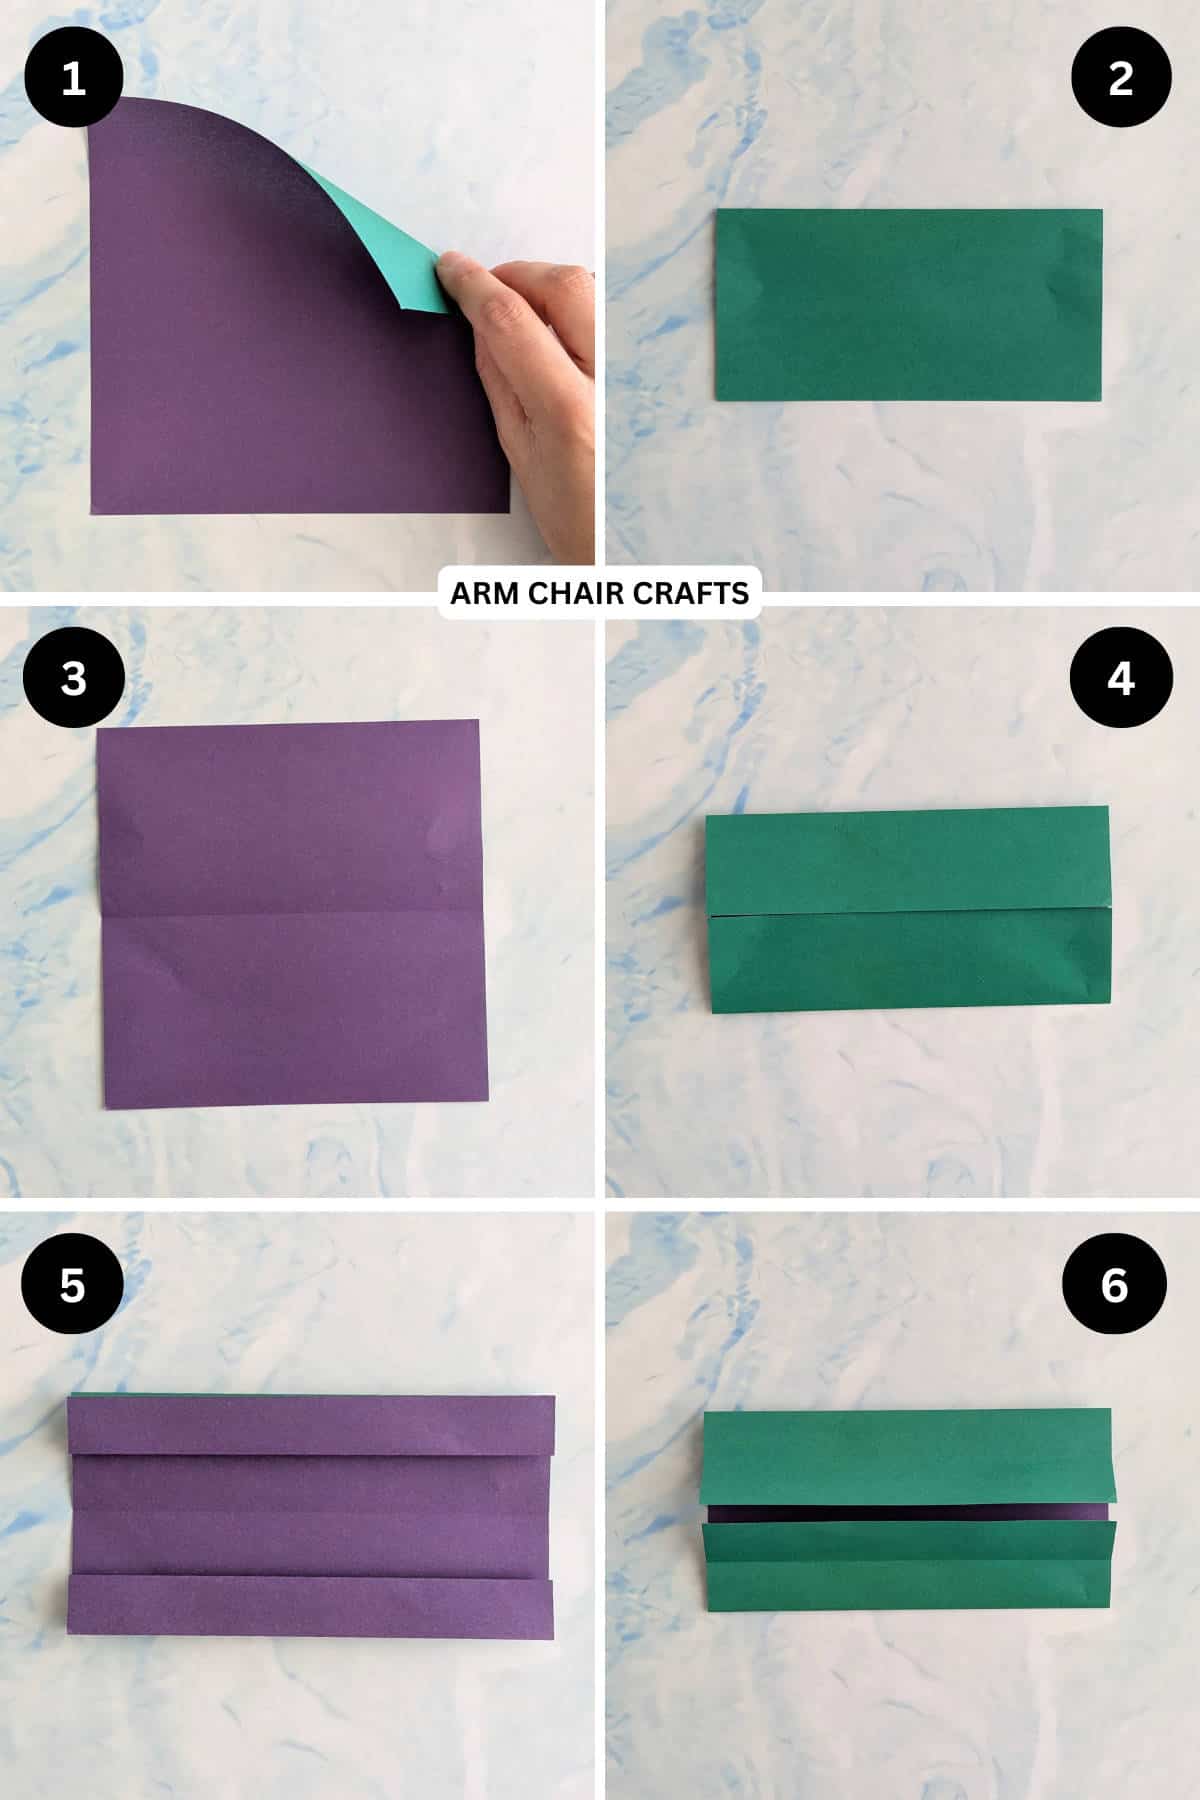
Step 7: Fold all four corners in to meet the lines shown.
Step 8: Fold the inner corners out to meet the lines shown.
Step 9: Fold the left and right edges in along the lines shown.
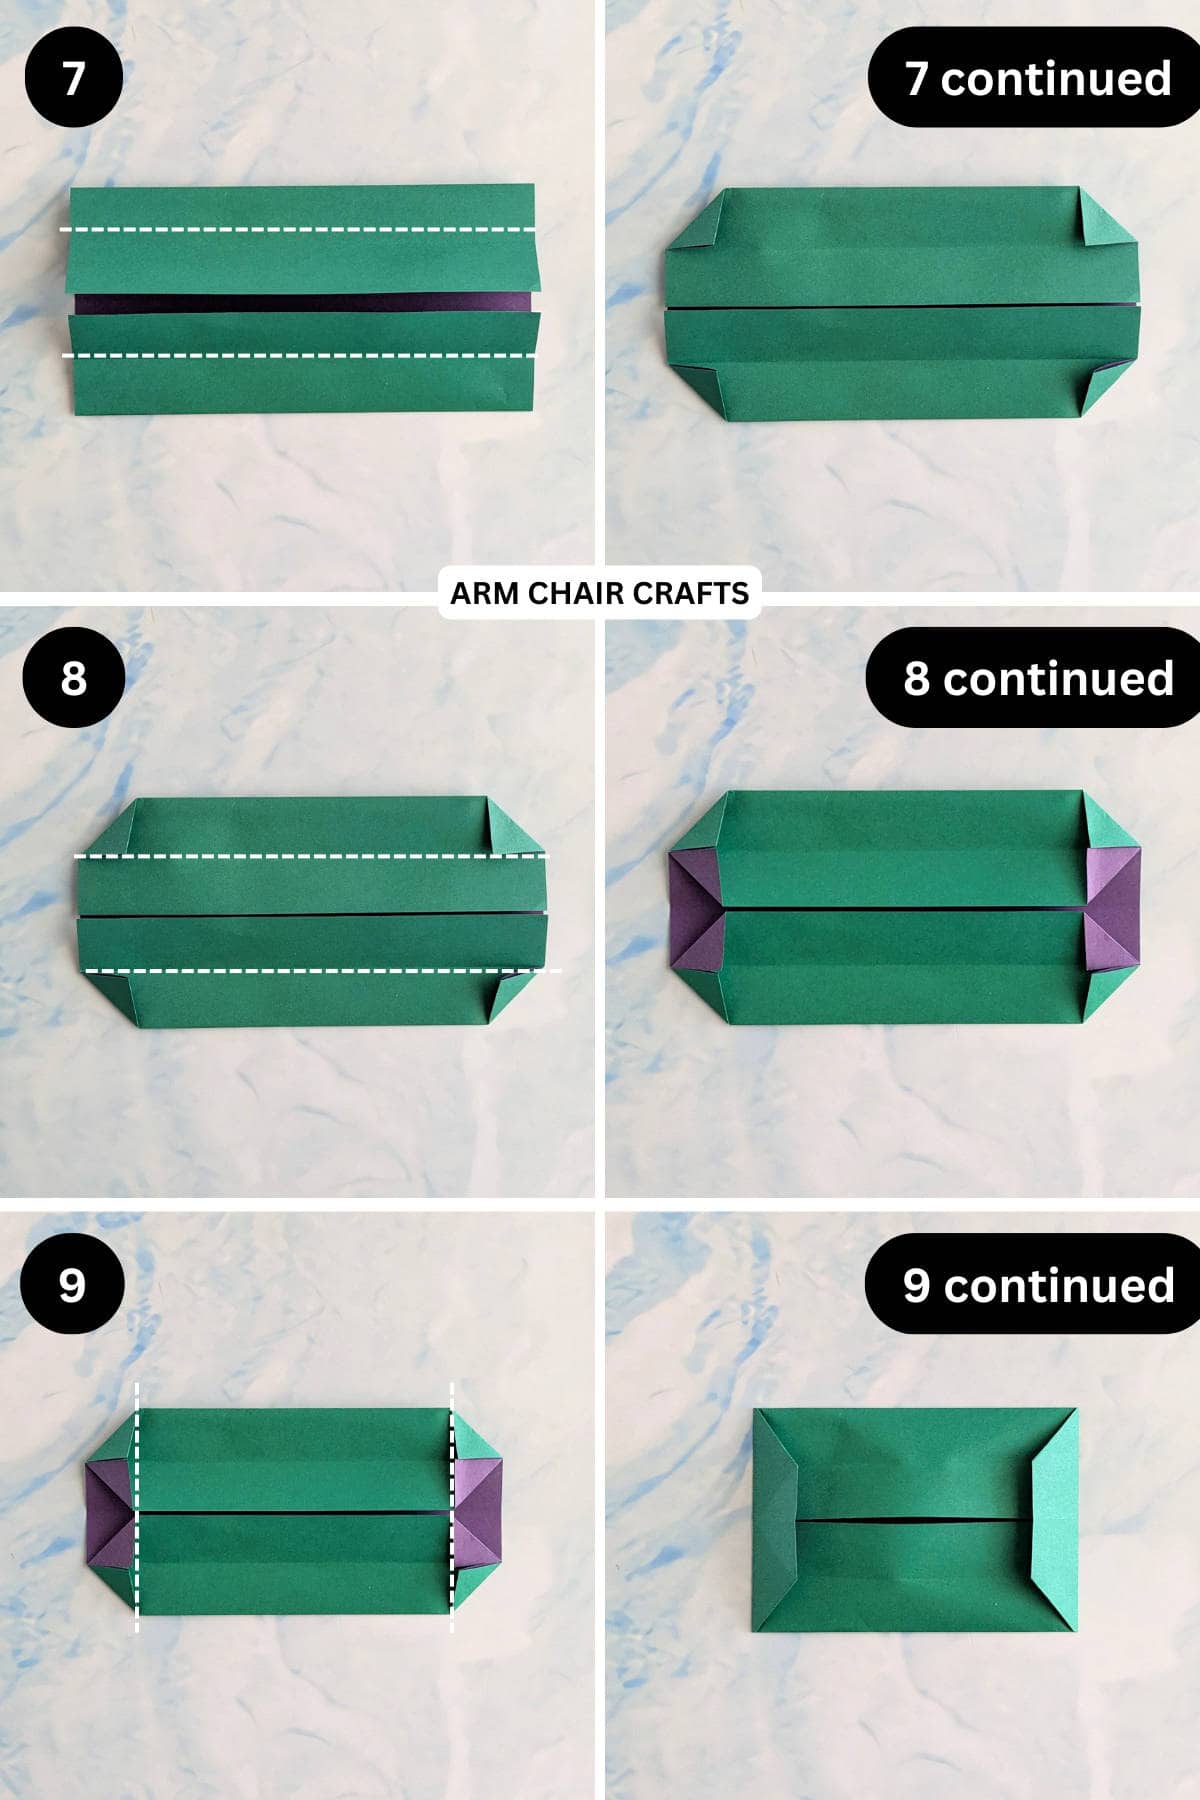
You're almost there!
To unlock the final steps and complete your pattern, create a free account with Grow.me. below.
Make sure you tick the box to subscribe to our newsletter and stay up to date with the latest patterns, tips, and more!
Once you're signed up, you'll get instant access to finish your project and enjoy exclusive content in the future.
Already signed up? Hit the button below and select 'Switch to Log In' to pick up where you left off and finish your project!
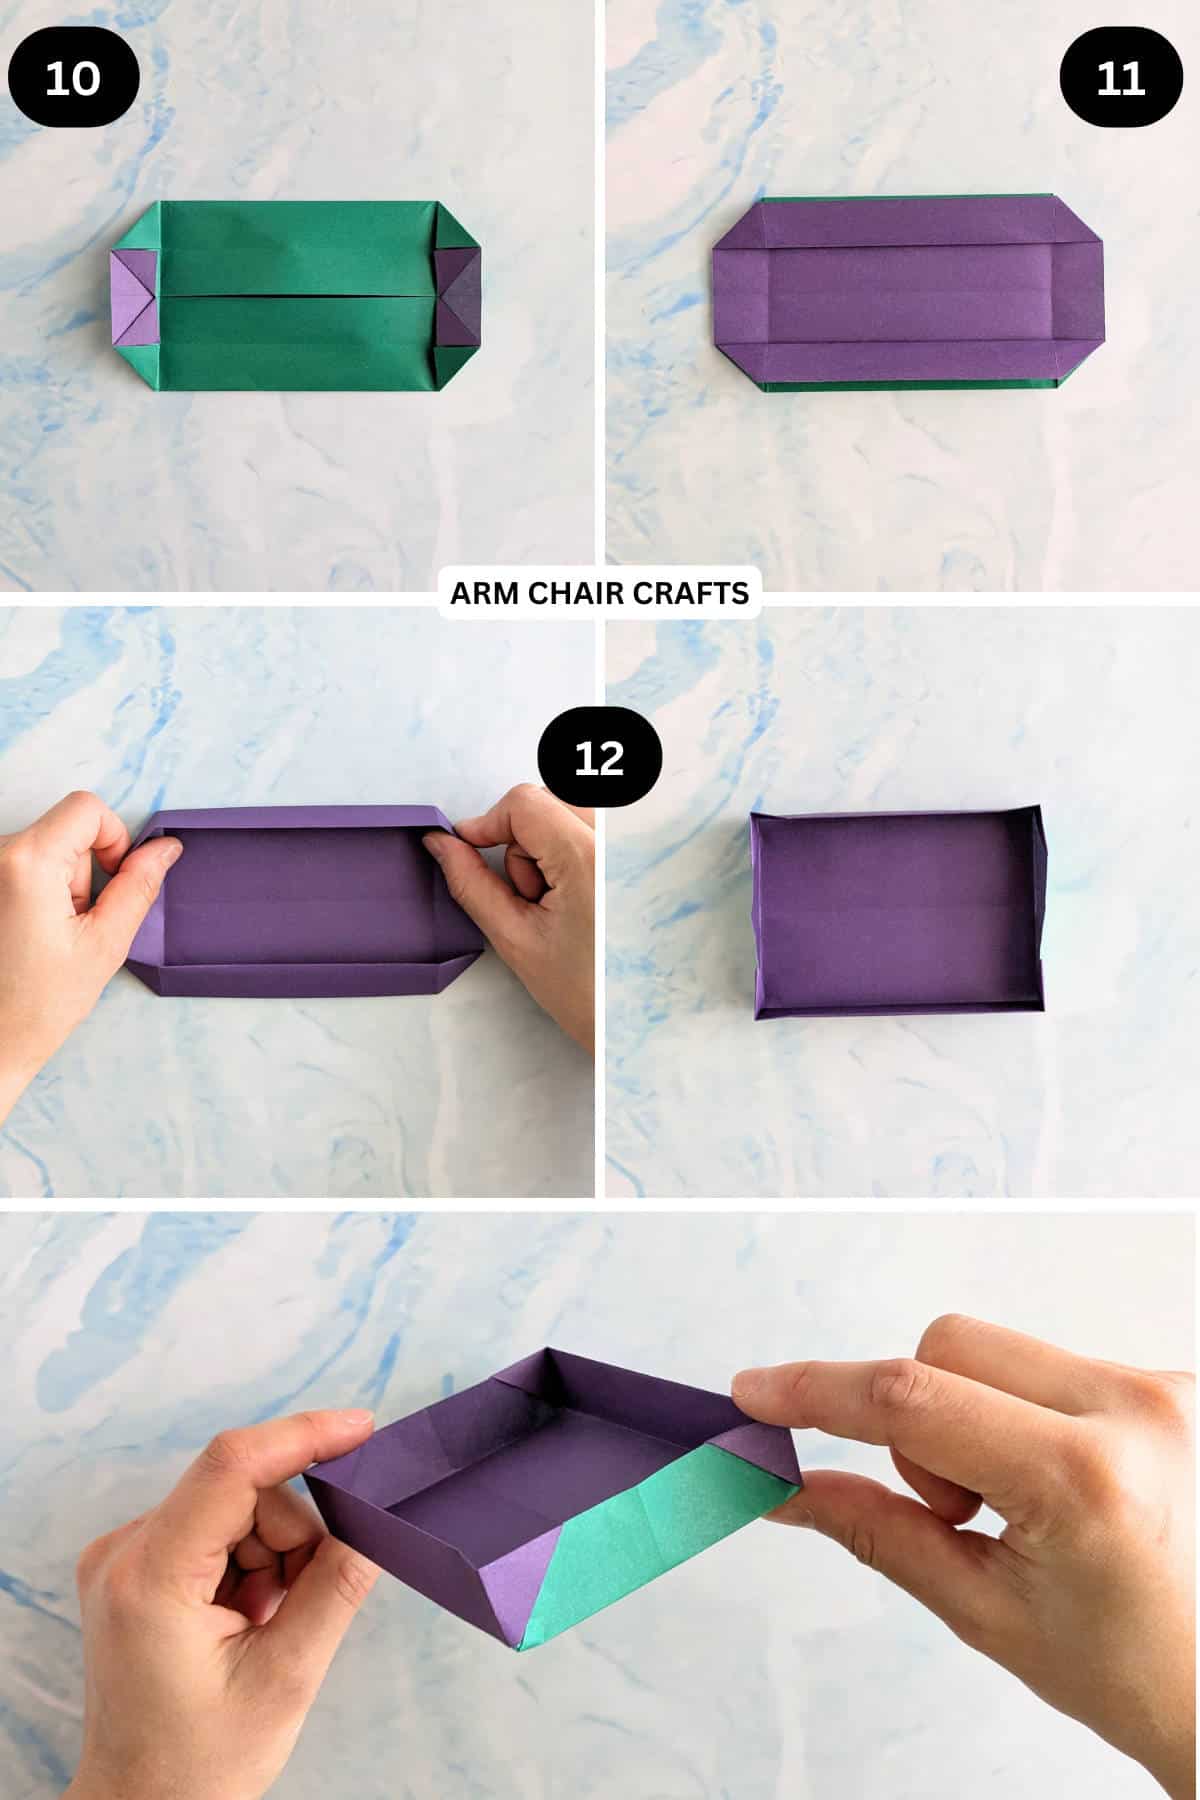
Step 10: Unfold previous step.
Step 11: Refold the top and bottom flaps to the outside along the existing creases you made in step 5.
Step 12: Carefully lift up the top and bottom edges to start shaping your tray. Re crease along the edges as needed.Completed tray.
Tips For Success
- Choose thicker paper if you want your origami tray to be sturdier, but avoid cardboard, which is too stiff to fold neatly (especially if you are making a small tray)
- If you plan to use the tray for cookies or unwrapped candies, place a small food-safe liner inside to protect both the treats and the paper.
- Patterned or double-sided paper adds extra charm - the folds reveal both sides beautifully.
- Practice the folds once on scrap paper to get a feel for the structure before using your favorite sheet.
Color, Paper Ideas, and Variations
- Elegant dessert tray: Use metallic or pastel paper for cookies at a tea party.
- Halloween version: Black or orange paper for wrapped candies.
- Christmas style: Red and green paper for holding peppermints or chocolates.
- Birthday theme: Bright patterned paper for fun, festive snack trays.
- Minimalist look: Solid white or kraft paper for a clean, simple display.
FAQ
Yes, just cut it into a square. Thicker paper works better for sturdiness when you are making a larger tray.
Yes, but only for dry, wrapped, or lined items. Add a liner if serving unwrapped cookies or candies (otherwise it can ruin the tray).
Other Easy Crafts You Might Like To Try:
Stay Connected
Made this pattern? Let us know how it went in the comments below!
Pin this post - Pin now to take your paper crafting skills to the next level.
Share on Instagram or Facebook - Capture the beauty of your finished project and share it on Instagram or Facebook! Tag us @armchaircrafts so we can see your work!