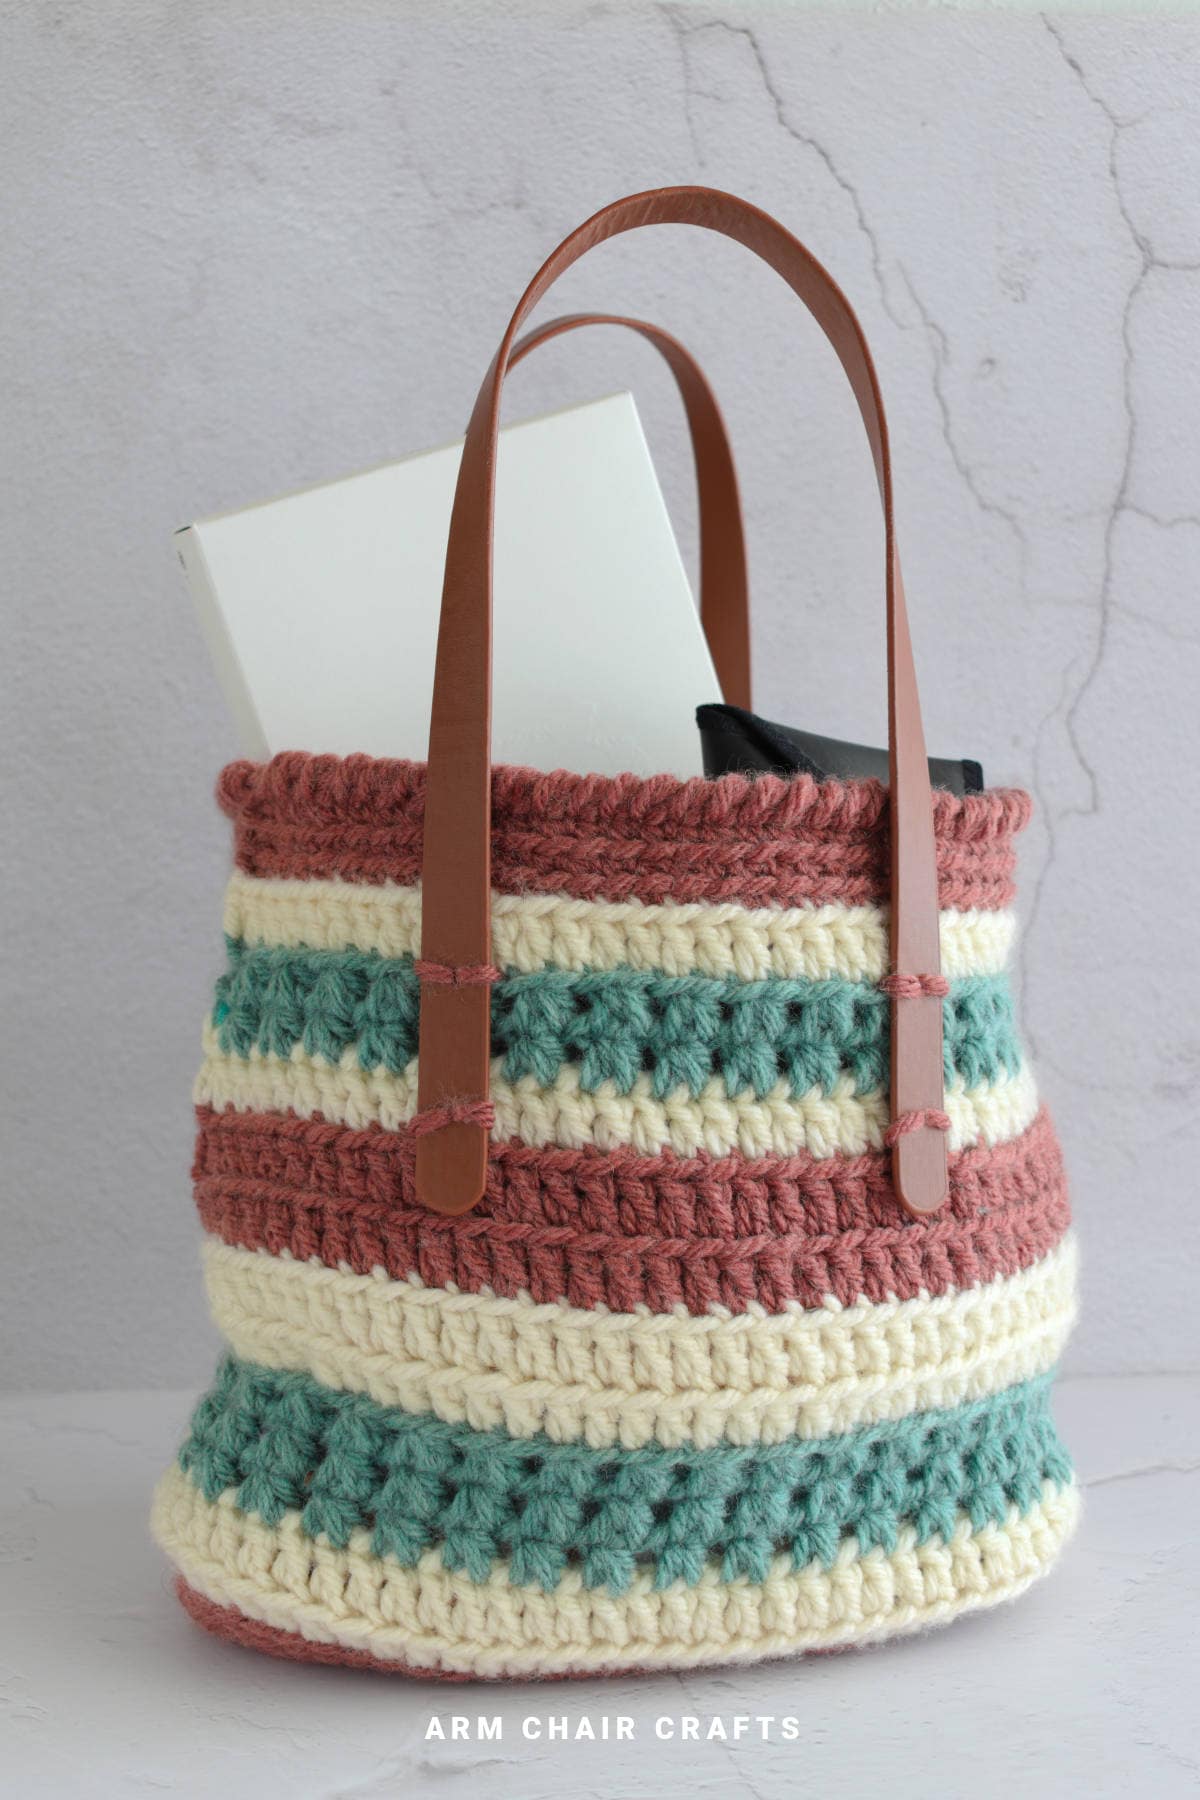
This easy crochet tote bag with handles is a practical, stylish project that works up beautifully with chunky yarn and simple construction.
Designed to be beginner-friendly, it gives you the option to sew on premade handles or crochet your own, making it easy to customize the look and feel.
Made with an acrylic blend yarn, this tote is sturdy, lightweight, and perfect for everyday use.
Whether you're heading to the store, packing a project bag, or making a thoughtful handmade gift, this tote bag is versatile, functional, and fun to create.
Exclusive PDF Patterns in the Recline and Unwind Club
Access ad-free, downloadable PDFs, the exclusive Arm Chair Craft's shop, and our growing community by joining the Recline and Unwind Club!
Jump to:
- Why You'll Love This Pattern
- Project Snapshot
- Materials Needed
- Yarn and Hook Information
- Stitches and Abbreviations - US Terms
- Special Stitches
- Gauge
- Emily's Notes
- Finished Size
- ⭐Get the PDF Version in the Recline and Unwind Club ⭐
- Instructions
- Crochet Tips, Yarn Choices, and Color Inspiration
- Perfect Occasions to Use This Craft
- How To Use This Craft
- FAQ
- More Crafts You Might Like To Try
- More Easy Patterns For You To Try
- Stay Connected
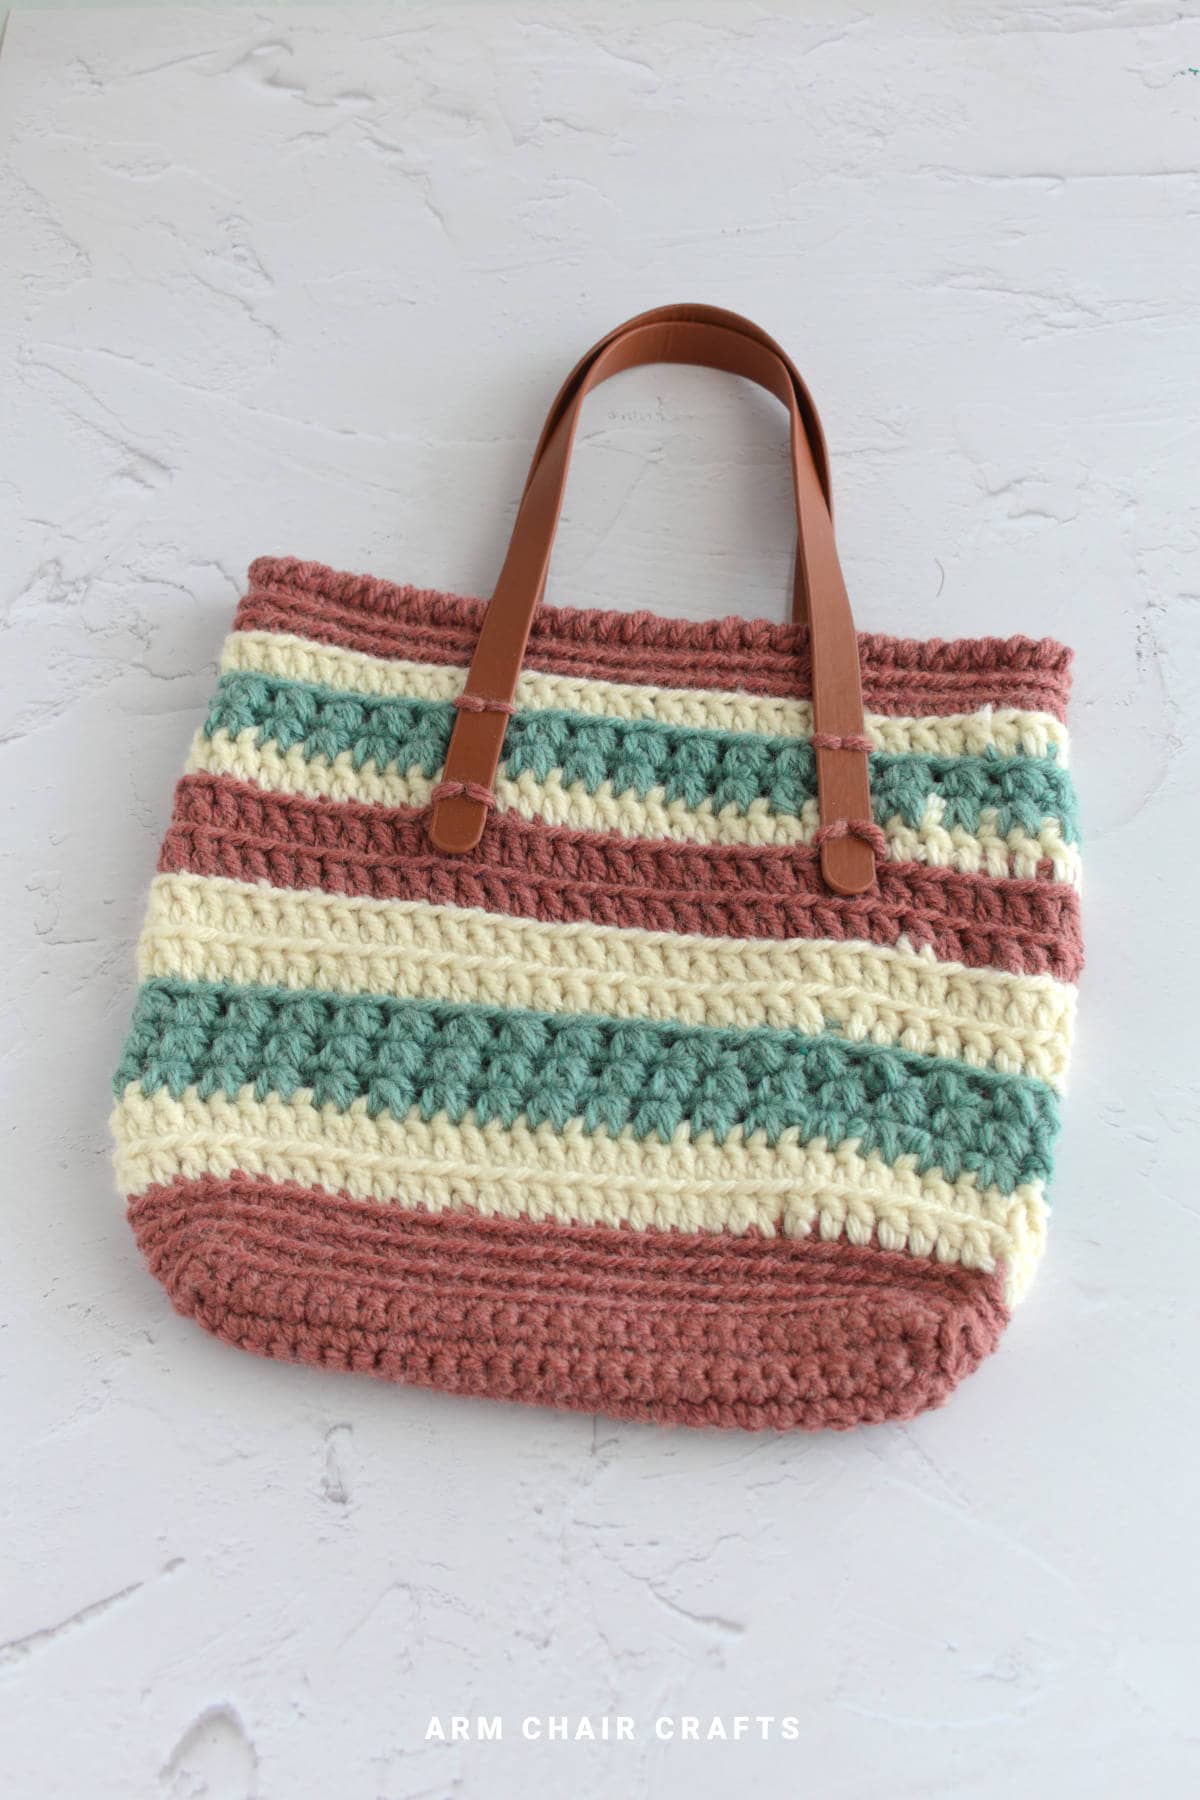
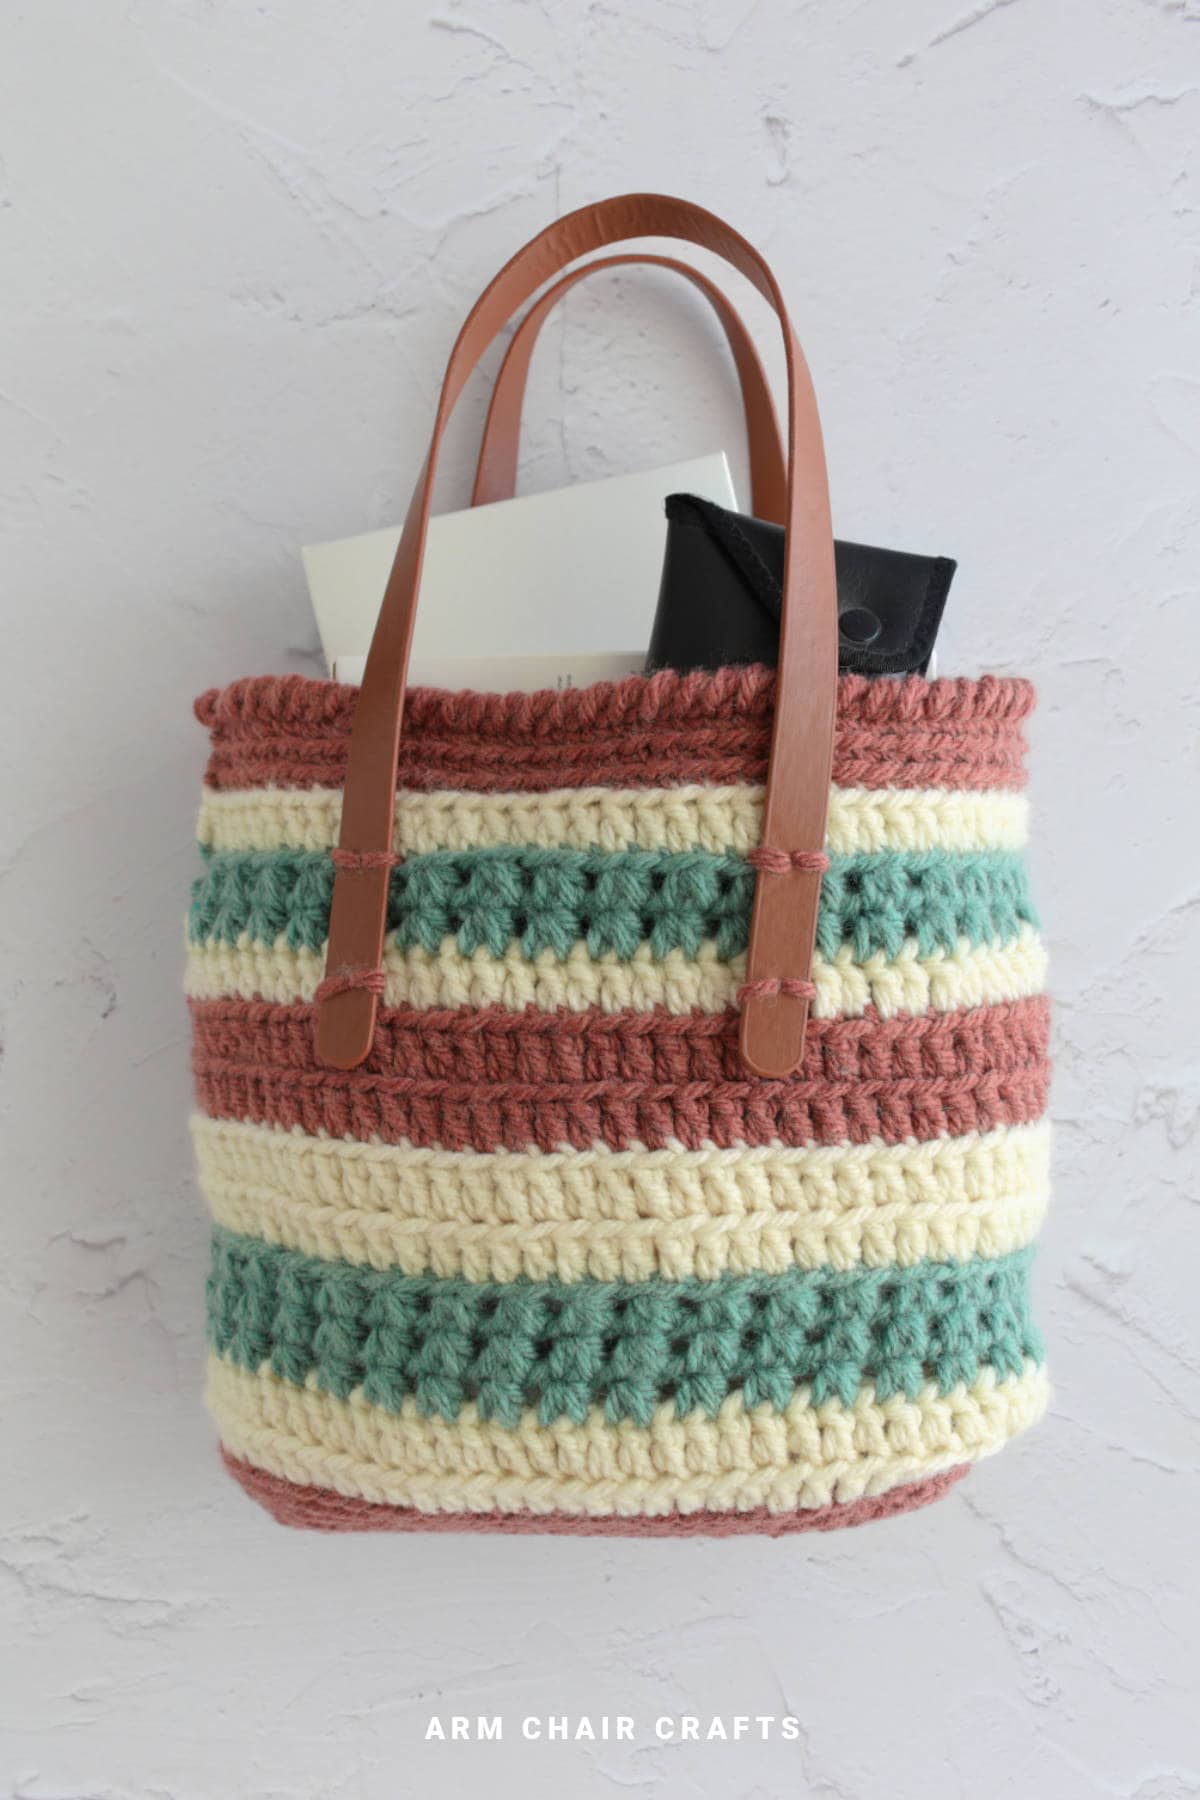
If you've ever wanted to make a crochet bag that's both useful and beginner-friendly, this easy crochet tote bag with handles is a great place to start.
An easy crochet tote bag with handles is a functional everyday bag made using structured stitches worked in rows and rounds, forming a sturdy fabric that holds shape when assembled with reinforced handles. It's a practical project that balances usability with handmade style.
Worked with chunky yarn, the bag builds up quickly, giving you a satisfying project that doesn't take weeks to finish.
What makes this easy crochet tote bag with handles especially appealing is its flexibility.
You can personalize it by choosing premade handles for a clean, structured look or crocheting your own handles for a fully handmade finish.
If you're learning how to crochet bags or want a reliable pattern you'll use more than once, this crochet tote bag with handles is a practical and creative option that fits a wide range of uses.
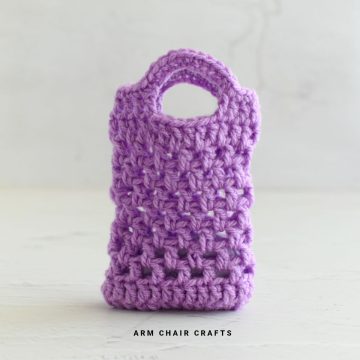
For more structured bag ideas, this crochet bag Isla is a simpler take or you might like this easy crochet bag Amelia, or simple crochet bag Olivia, both working well as handmade gift options.
Why You'll Love This Pattern
- Beginner-friendly construction with simple stitches
- Chunky yarn makes the bag work up quickly
- Option to use premade handles or crochet your own
- Durable yet lightweight acrylic blend yarn
- Practical size for everyday use
- Great project for learning how to crochet bags
Project Snapshot
Skill Level: Beginner to Intermediate
Time Needed: Great weekend crochet project with steady progress over a few sessions
Construction: Worked from base in rows, then in rounds, with attached handles (option to crochet handles provided)
Best For: Everyday use, shopping bags, gifts
Materials Needed
Yarn
#5 Bulky (chunky, 12 ply), acrylic or acrylic blend yarn with 8 Wraps Per Inch (WPI)*
- You will need 3 colors:
- Col A - Base and stripe color, e.g. red. About 2.5 ounces (71 grams) / 77 yards (71 meters).
- Col B - Secondary color, e.g. beige. About 2.4 ounces (67 grams) / 73 yards (67 meters).
- Col C - Tertiary color, e.g. blue (this will be used for the hdcc). About 1.3 ounces (37 grams) / 40 yards (37 meters).
Hook
- 6.5 mm (K, 10.5) hook
Other
- Yarn needle
- Scissors
*Wraps per inch (WPI) - this is a measure of yarn thickness. To measure WPI, count how many times the yarn wraps around a ruler in one inch. There are more wraps for thinner yarn and fewer wraps for thicker yarn.
Yarn and Hook Information
I used an acrylic blend for this bag, however, you could use cotton.
Stitches and Abbreviations - US Terms
- Ch - Chain
- St/s - Stitch/es
- Col - Color
- Sc - Single Crochet
- Blo - Back loop only
- Dc - Double Crochet
- Sl St - Slip Stitch
- Hdcc - Half Double Crochet Cluster (see special stitches below)
- Reverse single crochet (see special stitches below)
- FO - Fasten off
- [ ] at the end of each row indicates how many stitches are needed in that row.
Special Stitches
Half Double Crochet Cluster (Hdcc)
Essentially with this stitch you are creating a half double crochet decrease and chain 1.
How to make a half double crochet cluster
- Yarn over and insert hook into next stitch,
- Yarn over and pull up a loop (3 loops on hook)
- Yarn over and insert hook into next stitch,
- Yarn over and pull up a loop (5 loops on hook),
- Yarn over and pull through all 5 loops on hook.
- Chain 1.
Reverse Single Crochet (Crab Stitch)
The reverse single crochet, also known as the crab stitch, is a very simple stitch that can add texture to your crochet. It's great to use for edgings, especially on baskets.
To reverse single crochet, instead of working in the direction you normally would, you instead work backward.
So, normally you would work towards the left. In reverse single crochet, you would work towards the right. Note: you do not turn your work.
Gauge
Gauge is not too important for this crochet tote bag.
Emily's Notes
Tote bags like this feel different from smaller projects, you notice yourself getting more attached to it as it takes shape.
And once it's finished, it usually ends up being one of those things you actually use without thinking about it.
Finished Size
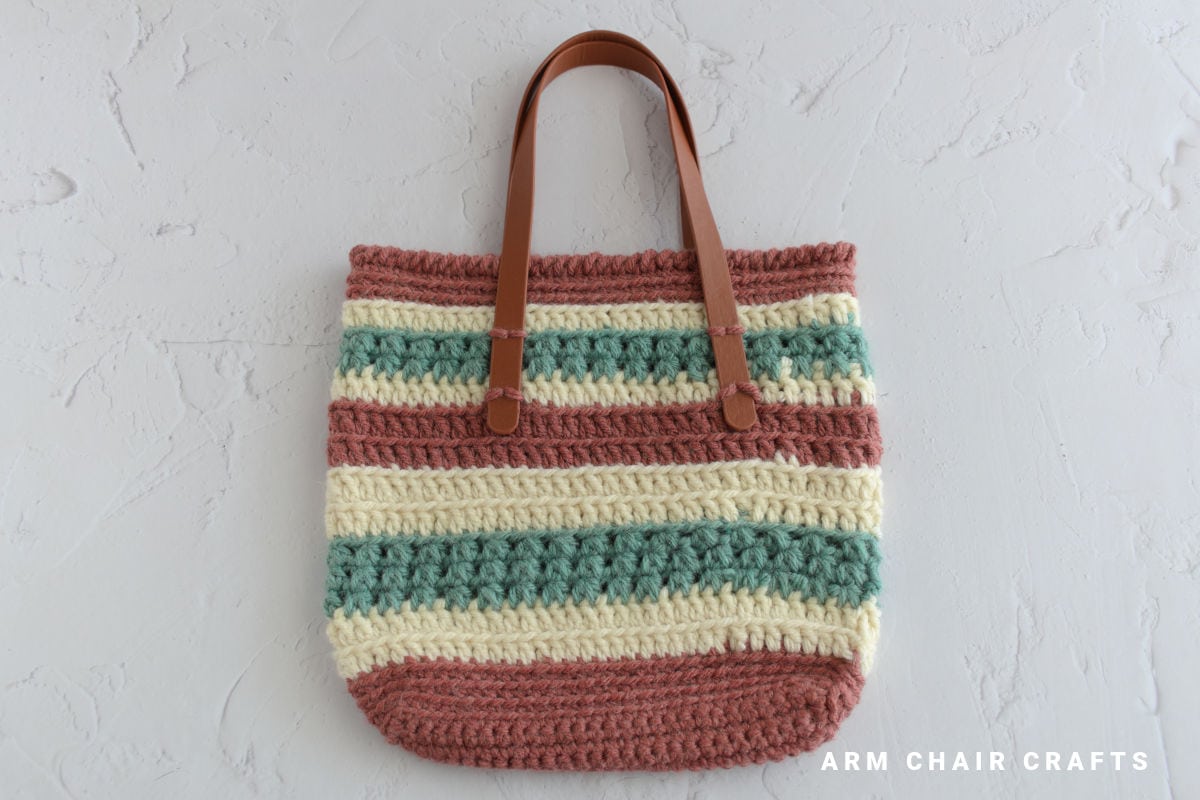
The finished size of this crochet tote bag is about 12 inches (30 cm) wide x 10 inches (25 cm) tall, with a base width of 4.5 inches (12 cm).
⭐Get the PDF Version in the Recline and Unwind Club ⭐
Access this pattern as an ad-free, downloadable PDF in the Recline and Unwind Club shop.
Copyright Notice
This pattern and its contents are protected by copyright law. It may not be copied, altered, redistributed, resold, translated, or used to produce photo or video tutorials in any format, either in whole or in part.
You are permitted to sell finished items made using this pattern. However, the written pattern itself may not be sold, shared, or distributed in any form. When marketing or displaying your finished items, please photograph your own work and refrain from using any of my original images.
Sharing Guidelines For Roundups - Bloggers you are welcome to include this pattern in roundup posts as a link, as long as you use one photo and link directly (with a do follow link) back to the original post. For full details, please refer to my Terms of Use page.
Instructions
- Col A - Base and stripe color, e.g. red
- Col B - Secondary color, e.g. beige
- Col C - Tertiary color, e.g. blue (this will be used for the hdcc)
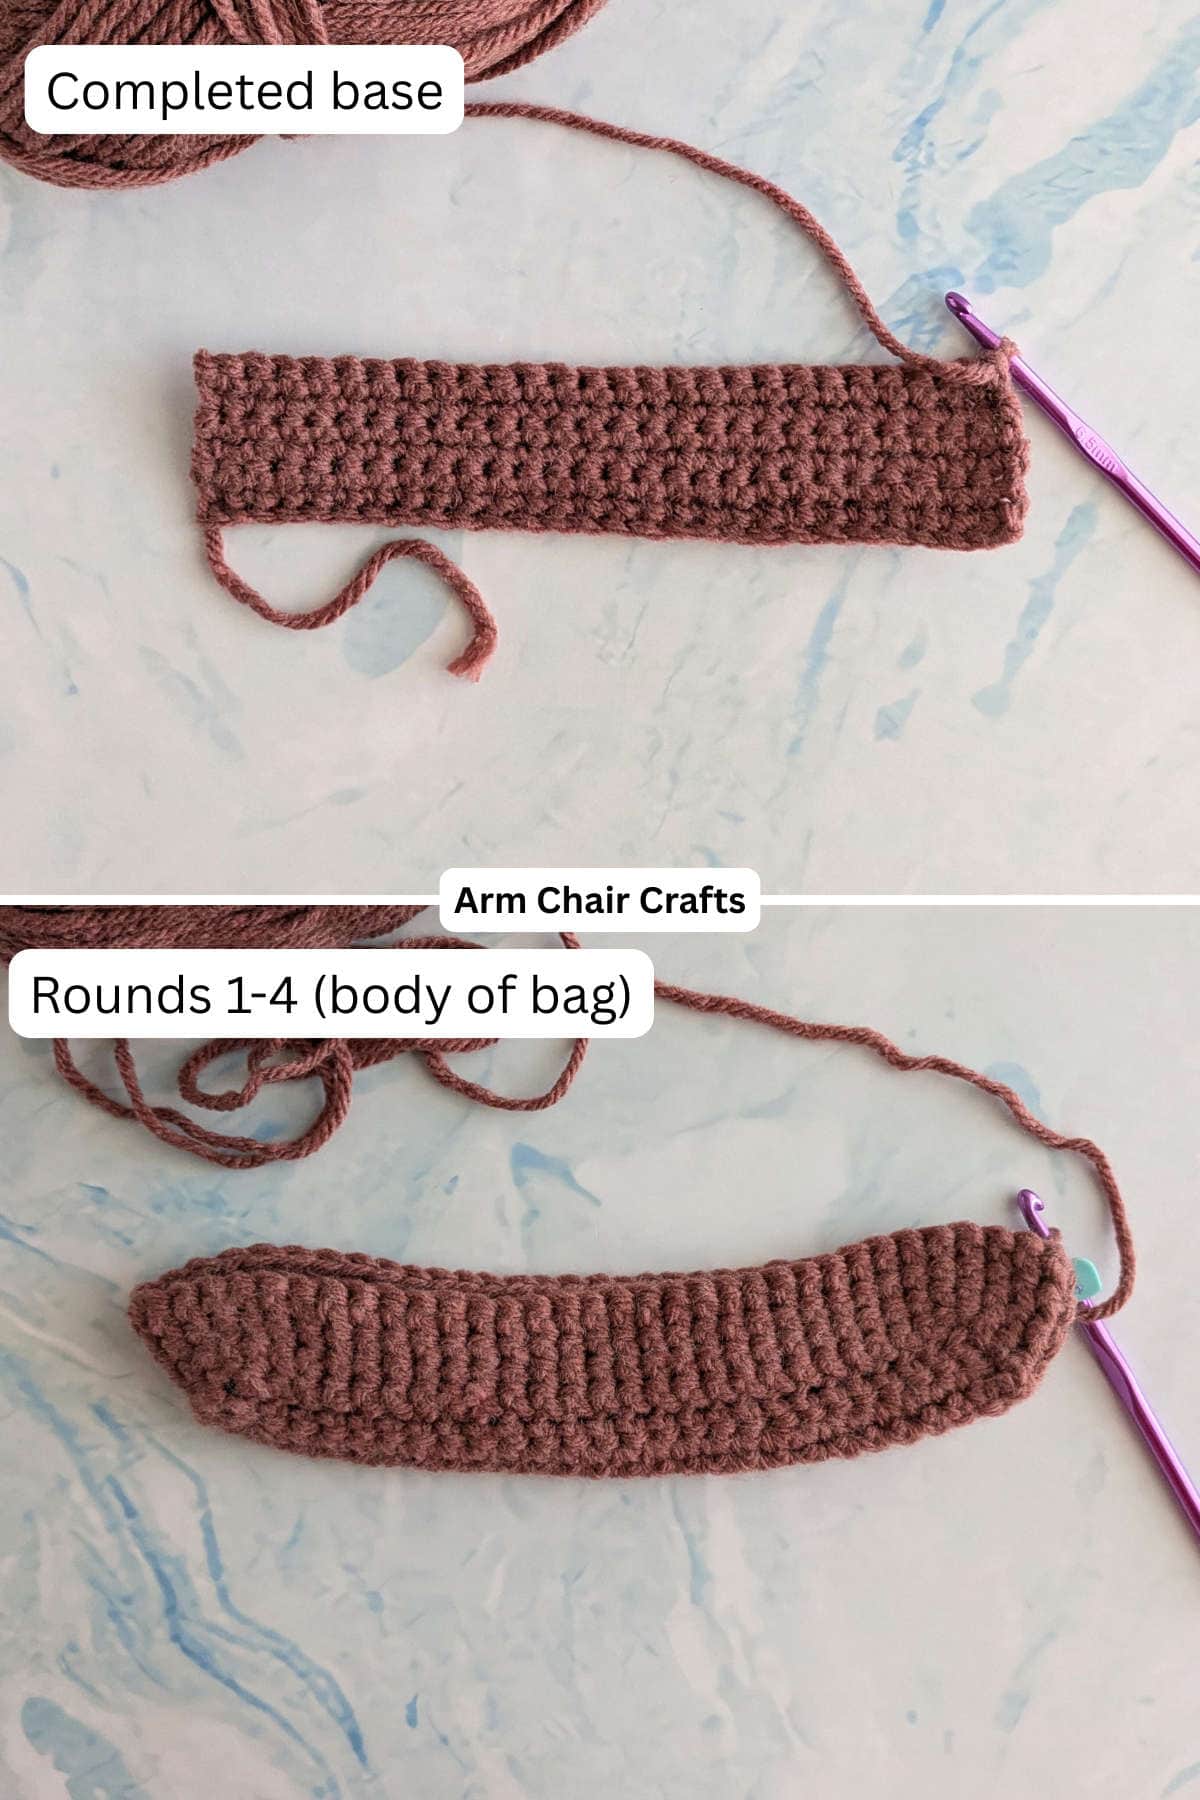
Making the Base
First, you will be working in rows.
Foundation: Col A, ch 28
Row 1: 1 sc in 2nd from hook, 1 sc in each ch across. Turn. [27 sc].
Row 2: Ch1, 1 sc in each st across. Turn. [27 sc].
Row 3 - 6: Repeat row 2. Turn after final row.
Making the Body of the Bag
Now, you will be working in the round.
Round 1: Ch1, 3 sc in 1st st, 1 sc in each of next 24 sts, 3 sc in next st (this should be the corner), make 4 evenly spaced sc along the short edge, 3 sc in next st (this should be the corner), 1 sc in each of next 24 sts, 3 sc in next st (this should be the corner), make 4 evenly spaced sc along the short edge, sl st into top of 1st sc to join. [68 sc].
Round 2 - 4: Ch1, 1 sc blo in each st around, sl st into top of 1st sc to join. [68 sc in each row].
You're almost there!
To unlock the final steps and complete your pattern, create a free account with Grow.me. below.
Make sure you tick the box to subscribe to our newsletter and stay up to date with the latest patterns, tips, and more!
Once you're signed up, you'll get instant access to finish your project and enjoy exclusive content in the future.
Already signed up? Hit the button below and select 'Switch to Log In' to pick up where you left off and finish your project!
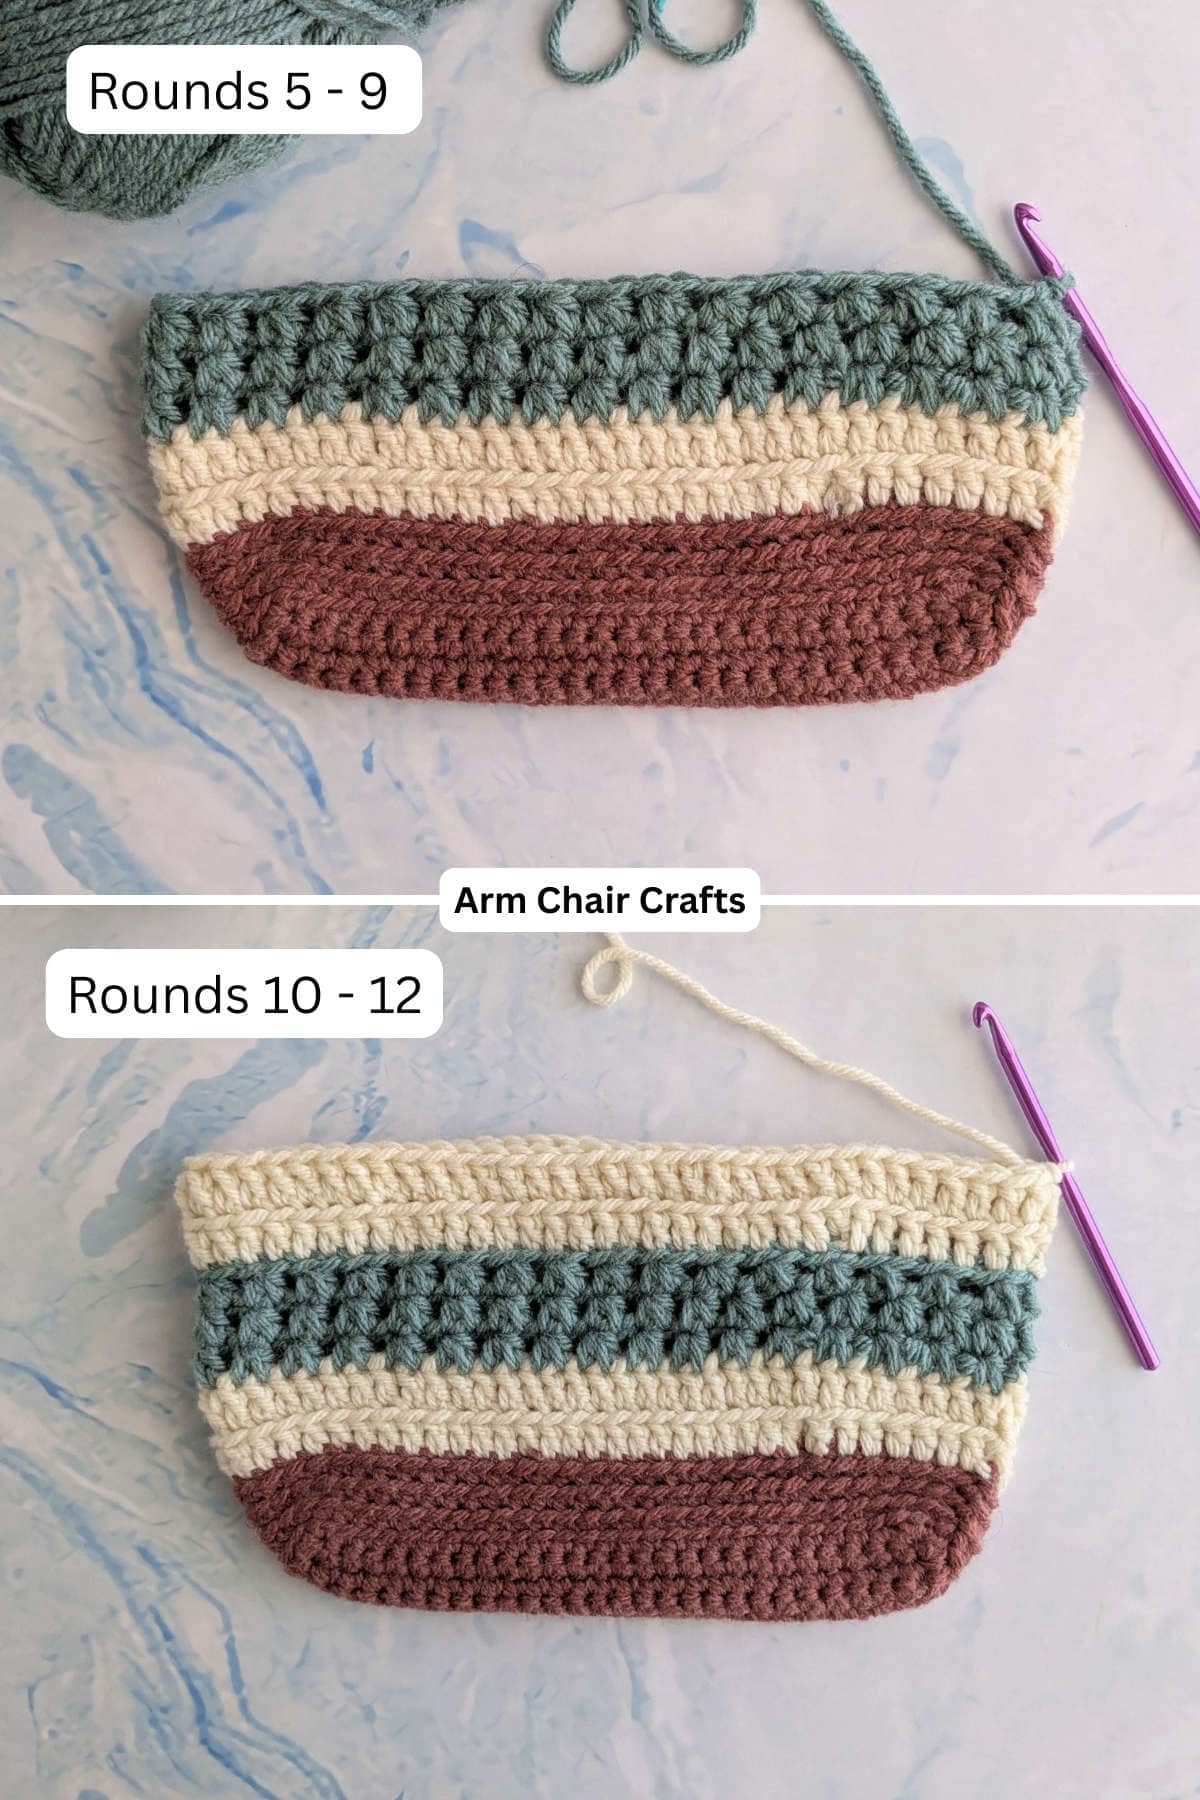
Round 5: Change to Col B, Ch2, 1 dc blo in each st around, sl st into top of 1st dc to join. [68 dc].
Round 6: Ch2, 1 dc blo in each st around, sl st into top of 1st dc to join. [68 dc].
Round 7: Change to Col C, Ch2, hdcc starting in 1st st, hdcc around, sl st into top of 1st hdcc to join. [68 sts].
Round 8 - 9: Ch2, hdcc starting in 1st st, hdcc around, sl st into top of 1st hdcc to join. [68 sts].
Round 10: Change to col B, ch2, 1 dc blo in each st around, sl st into top of 1st dc to join. [68 dc].
Round 11: Ch2, 1 dc blo in each st around, sl st into top of 1st dc to join. [68 dc].
Round 12: Change to col A, ch2, 1 dc blo in each st around, sl st into top of 1st dc to join. [68 dc].
Round 13: Ch2, 1 dc blo in each st around, sl st into top of 1st dc to join. [68 dc].
Round 14: Change to Col B, ch2, 1 dc blo in each st around, sl st into top of 1st dc to join
Round 15: Change to col C, ch2, hdcc starting in 1st st, hdcc around, sl st into top of 1st hdcc to join. [68 sts].
Round 16: Ch2, hdcc starting in 1st st, hdcc around, sl st into top of 1st hdcc to join. [68 sts].
Round 17: Change to Col B, ch2, 1 dc blo in each st around, sl st into top of 1st dc to join. [68 dc].
Round 18: Change to col A, ch1, 1 sc in each st around, sl st into top of 1st sc to join. [68 sc].
Round 19 - 20: Ch1, 1 sc in each st around, sl st into top of 1st sc to join. [68 sc in each round].
Round 21: Ch1, 1 reverse sc in each st around, sl st into 1st reverse sc to join. FO, weaving in any ends. [68 sts].
Making the handles
You have various options when it comes to handles. You could crochet your own handles or use storebought handles.
If you are using storebought handles, attach or sew them on.
If you want to crochet your own handles, below are the instructions:
Make 2
Foundation: Col A, ch 5.
Row 1: 1 sc in 2nd ch from hook, 1 sc in each st across. Turn. [4 sc].
Row 2: Ch1, 1 sc in each st across. Turn. [4 sc].
Repeat row 2 until you get your desired handle length. I recommend making the handle length about 23 inches (58 cm) long.
Once you have created two handles, it's time to position them on your bag. Ensure that the positioning of both handles are symmetrical.
For example, if you plan to attach one handle starting at stitch 7 on the front side of the bag, the opposite handle should also start at stitch 7 on the back side.
Additionally, make sure that each handle has the same number of stitches remaining at the other end. This will ensure a balanced and professional look.
Once your are happy with the positioning of the handles, pin them in place.
Then, using Col A and a sewing needle, attach the handles to the bag. FO and weave in any ends.
Tip: make sure your handles are not twisted before you sew them on!
Looking for your next crochet project?
Explore the Recline and Unwind Club for exclusive ad-free crochet patterns, tips, and shop.
Crochet Tips, Yarn Choices, and Color Inspiration
- Chunky yarn helps the tote hold its shape
- Reinforce handle attachment areas for extra strength
- Choose handle length based on shoulder or hand carry
- Make one as a gift, then another for yourself!
- Neutral colors for a classic everyday tote
- Bright shades for summer or beach bags
- Variegated yarn for added visual interest
- Mix textures by pairing smooth yarn with statement handles
- Adjust bag height or width to suit different needs
Perfect Occasions to Use This Craft
- Use it as an everyday tote for errands or shopping.
- Gift it as a handmade bag for birthdays or holidays.
- Make one as a reusable bag for casual outings.
- Perfect for craft fairs or handmade gift exchanges.
- Great as a thoughtful, practical crochet gift idea.
How To Use This Craft
- Carry groceries, books, or daily essentials.
- Use as a project bag for crochet or knitting.
- Pack for beach days or casual trips.
- Gift as a stylish handmade alternative to store-bought totes.
- Create matching bags for friends or family.
FAQ
Yes, it uses simple stitches and straightforward construction.
Absolutely. Both options work well and give different looks.
Definitely. It's a great introduction to structure, shaping, and handles.
More Crafts You Might Like To Try
More Easy Patterns For You To Try
Looking for more patterns like this? Why not try one of these:


Stay Connected
Made this pattern? Let us know how it went in the comments below!
Pin this post - Pin now to take your paper crafting skills to the next level.
Share on Instagram or Facebook - Capture the beauty of your finished project and share it on Instagram or Facebook! Tag us @armchaircrafts so we can see your work!