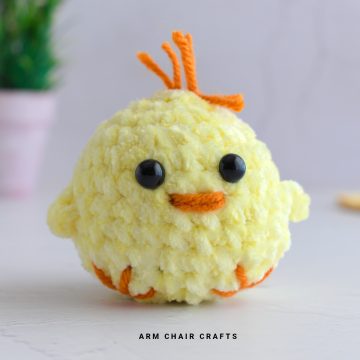
Meet Coco, the easy crochet amigurumi bunny who's ready to hop into your home!
Using any yarn and an appropriate hook, Coco is perfect for Easter, spring crafts, or a handmade gift that feels personal.
Learning how to crochet Coco is a relaxing, meditative process, and the finished bunny is irresistibly soft and adorable.

Exclusive PDF Patterns in the Recline and Unwind Club
Access ad-free, downloadable PDFs, the exclusive Arm Chair Craft's shop, and our growing community by joining the Recline and Unwind Club!
Jump to:
- Why You'll Love This Pattern
- Project Snapshot
- Materials Needed
- Yarn and Hook Information
- Stitches and Abbreviations - US Terms
- Special Stitches
- Gauge
- Emily's Notes
- Finished Size
- ⭐Get the PDF Version in the Recline and Unwind Club ⭐
- Instructions
- Crochet Tips, Yarn Choices, and Color Inspiration
- Perfect Occasions to Use This Craft
- How To Use This Craft
- Common Mistakes To Avoid
- FAQ
- More Crafts You Might Like To Try
- More Easy Patterns For You To Try
- Stay Connected
This easy crochet amigurumi bunny "Coco" is a beginner-friendly stuffed animal pattern that guides you through creating a small crochet bunny using basic stitches, shaping techniques, and simple assembly.
The finished bunny is soft, decorative, and suitable as a handmade gift or collectible amigurumi project.
Stitch by stitch, a flat piece of yarn transforms into a soft, upright little bunny, complete with floppy ears and a plump body.
This project is accessible for beginners while still engaging for experienced crocheters, offering a satisfying sense of progress and accomplishment with each round.
You can make her a tabletop companion, to practice making crochet animals, a little gift for a loved one, or part of a larger spring or Easter display.
Learning how to crochet Coco also reinforces basic amigurumi techniques like working in rounds, shaping, and stuffing, skills you can use again and again.
Watching her form stitch by stitch encourages patience, focus, and mindfulness, while the end result is a soft, huggable bunny that brings instant charm to any space.

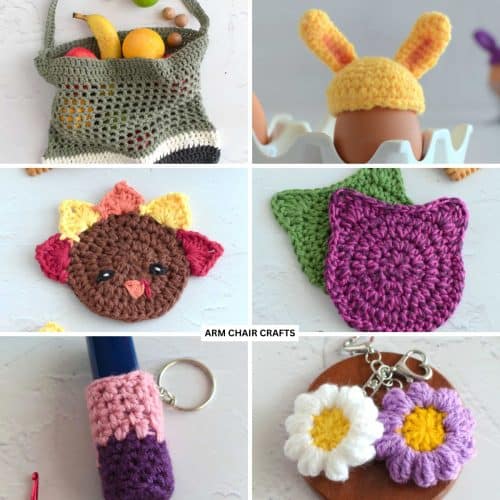
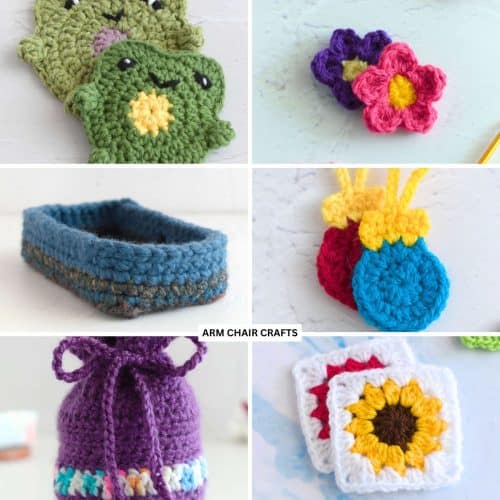
If cute crochet animal patterns are your thing, this gummy bear crochet keychain or frog crochet coasters may be worth a look.
Why You'll Love This Pattern
- It's simple enough for beginners but still fun for experienced crocheters.
- Works with any yarn and hook size you have on hand.
- Coco comes to life stitch by stitch, giving a meditative, relaxing experience.
- Perfect for gifts, spring décor, Easter, or seasonal crafts.
- Learning how to crochet Coco builds skills you can use for future amigurumi projects.
- This is a low sew pattern - you only need to sew on the ears. The arms and legs are crocheted in!
Project Snapshot
Project Type: Amigurumi crochet toy / stuffed animal
Skill Level: Beginner
Time Required: Medium quick make, it took me under 1 hour to make.
Best For: Handmade gifts, seasonal makes, decorative toys, crochet animal collections
Skill Focus: Working in the round, shaping, stuffing, basic assembly and sewing parts together
Construction Style: Worked in rounds with ears joined and stuffed
Materials Needed
Yarn
- #5 Bulky Velvet or chenille yarn, with 7 Wraps Per Inch (WPI)*
- You will need yarn for the bunny's body and for the mouth.
Hook
- 6 mm (J / 10)
Other
- Yarn needle
- Fiberfill
- Scissors
- Safety Eyes
*Wraps per inch (WPI) - this is a measure of yarn thickness. To measure WPI, count how many times the yarn wraps around a ruler in one inch. There are more wraps for thinner yarn and fewer wraps for thicker yarn.
Yarn and Hook Information
Worsted weight cotton, acrylic, or soft wool. Cotton gives a firm shape, acrylic is forgiving, and wool adds softness and warmth.
I like to use chenille yarn to make Coco.
Stitches and Abbreviations - US Terms
- Ch - Chain
- St/s - Stitch/es
- Sc - Single Crochet
- 3 DC bobble - 3 Double Crochet Bobble Stitch (see special stitches below)
- 4 TR bobble - 4 Treble Crochet Bobble Stitch (see special stitches below)
- Sc2tog - Single Crochet 2 Together (see special stitches below)
- FO - Fasten Off
- [ ] at the end of each row indicates how many stitches are needed in that row.
Special Stitches
3 DC Bobble
*Yarn over, insert hook into stitch, pull up a loop. Yarn over and pull through 2 loops on hook,* repeat twice more. You should have 3 DC and the beginning loop on the hook. Yarn over and pull through all 4 loops on hook. Completed 3 DC Bobble Stitch.
4 TR Bobble
*Yarn over twice, insert hook into stitch, pull up a loop. Yarn over and pull through 2 loops on hook, yarn over and pull through 2 loops on hook again,* repeat 3 more times. You should have 5 loops on your hook. Yarn over and pull through all 5 loops. Completed 4 TR Bobble stitch.
Sc2tog (Single Crochet 2 Together)
Sc2tog (Single Crochet Two Together) is a decrease stitch used in crochet to reduce the number of stitches.
How to Do sc2tog:
- Insert your hook into the first stitch.
- Yarn over and pull up a loop (2 loops on hook).
- Insert hook into the next stitch.
- Yarn over and pull up another loop (3 loops on hook).
- Yarn over again and pull through all 3 loops.
Gauge
Gauge is not too important for this crochet bunny pattern.
Emily's Notes
Character-style amigurumi like this bunny are great because they turn simple shapes into something expressive and cute.
The main learning curve usually isn't the stitches themselves, but keeping tension consistent so the stuffing sits evenly.
Once that clicks, these types of projects become really enjoyable and quite fast to make.
Finished Size

The finished size of Coco is about 2.80 inches x 3 inches (7 cm x 8 cm) not including the ear height.
⭐Get the PDF Version in the Recline and Unwind Club ⭐
Access this pattern as an ad-free, downloadable PDF in the Recline and Unwind Club shop.
Copyright Notice
This pattern and its contents are protected by copyright law. It may not be copied, altered, redistributed, resold, translated, or used to produce photo or video tutorials in any format, either in whole or in part.
You are permitted to sell finished items made using this pattern. However, the written pattern itself may not be sold, shared, or distributed in any form. When marketing or displaying your finished items, please photograph your own work and refrain from using any of my original images.
Sharing Guidelines For Roundups - Bloggers you are welcome to include this pattern in roundup posts as a link, as long as you use one photo and link directly (with a do follow link) back to the original post. For full details, please refer to my Terms of Use page.
Instructions
Making the Body
Round 1: Make a magic ring, then make 8 sc into the ring. Pull tail tight to close ring. [8 sc].
Round 2: 2 sc in 1st st, 2 sc in each st around. [16 sc].
Round 3: 2 sc in 1st st, 1 sc in next st, *2 sc in next st, 1 sc in next st,* repeat from * around. [24 sc].
Round 4 (Feet): 1 sc in each of the next 9 sts, 3 DC bobble in next st,1 sc in each of the next 4 sts, 3 DC bobble in next st, 1 sc in each of the next 9 sts. [24 sts].
Round 5 (Tail): 4 TC Bobble Stitch in 1st st, 1 sc in each of the next 23 sts. [24 sts].
Round 6: 1 sc in each st around. [24 sc].
You're almost there!
To unlock the final steps and complete your pattern, create a free account with Grow.me. below.
Make sure you tick the box to subscribe to our newsletter and stay up to date with the latest patterns, tips, and more!
Once you're signed up, you'll get instant access to finish your project and enjoy exclusive content in the future.
Already signed up? Hit the button below and select 'Switch to Log In' to pick up where you left off and finish your project!
Round 7 - 8: 1 sc in each st around. [24 sc in each round].
Round 9 (Arms): 1 sc in each of the next 8 sts, 3 DC bobble in next st, 1 sc in each of the next 8 sts, 3 DC bobble in next st,1 sc in each of the next 6 sts. [24 sts].
Round 8: (1 sc in next st, sc2tog) repeat 8 times [16 sc].
Round 9: 1 sc in each st around. [16 sc].

Round 10 - 11: 1 sc in each st around. [16 sc in each round].
Begin to stuff your bunny.
Round 12: sc2tog around. [8 sc].
Place your safety eyes between rounds 11 and 12, at least 4 sts apart, make sure they are centered (you can use both the arms and legs as a guide). You will sew on the nose later.
Finish stuffing your bunny.
Round 13: Sl st in each of the next 2 sts. FO, leaving a long tail. Weave the long tail through the front loop of the stitches, pull tight to close the hole. Weave in any ends. [2 sl st].
Using light pink yarn (or any color you would like), embroider a nose centered between the eyes.
Making the Ears
Make 2
Round 1: Make a magic ring, 4 sc into ring. Pull tail tight to close. [4 sc].
Round 2: 2 sc in each st around. [8 sc].
Round 3: 2 sc in 1st st, 1 sc in next st, *2 sc in next st, 1 sc in next st,* repeat from * around. [12 sc].
Round 4: 1 sc in each st around. [12 sc].
Round 5: (1 sc in next st, sc2tog) repeat 4 times. [8 sc].
Round 6: 1 sc in each st around. [8 sc].
Round 7: 1 sc in next st, sc2tog, 1 sc in each of next 2 sts, sc2tog, 1 sc in next st. [6 sc].
Round 8: 1 sc in each st around. [6 sc].
Round 9: Sl st in each of next 2 sts. FO, leaving a long tail for sewing.

Finishing
Whip stitch your ears to your bunny's body, on either side of the closed right. Place them about 0.75 inches (2 cm) apart.
I placed mine over rounds 13 to 15. Weave in any ends.
Looking for your next crochet project?
Explore the Recline and Unwind Club for exclusive ad-free crochet patterns, tips, and shop.
Crochet Tips, Yarn Choices, and Color Inspiration
- Stuff gradually to keep Coco plump but not stretched.
- Keep tension even to maintain a neat, uniform shape
- Colors: soft neutrals for a classic bunny, pastels for spring/Easter, or playful bright colors.
- Fluffy or textured yarn gives a cute, huggable feel; smooth cotton produces a clean, display-friendly look.
- Add small accessories like a ribbon or bow for extra personality.
- Make Coco in multiple sizes for a playful bunny family.
Perfect Occasions to Use This Craft
- Easter decorations or gifts.
- Springtime décor for home or classroom.
- Birthday or special occasion gifts.
- Nursery décor or children's room accents.
- Fun amigurumi collections for gifting or personal enjoyment.
How To Use This Craft
- Easter décor: Place Coco in baskets, table arrangements, or as part of a centerpiece.
- Gifts: Handmade amigurumi bunnies make thoughtful gifts for children or friends.
- Seasonal displays: Perfect for springtime decorating or nursery setups.
- Teaching tool: Coco is an excellent beginner amigurumi project to practice shaping, rounds, and stuffing.
- Playful décor: Keep her on a shelf, desk, or as part of a mini animal collection.
Common Mistakes To Avoid
- Uneven stuffing can distort bunny proportions
- Missing stitch markers can cause loss of round alignment
- Tight tension may make shaping uneven or stiff
- Overstuffing can stretch seams and affect symmetry
- Incorrect stitch counts can change head/body proportions
- Weak seam joining can cause parts to loosen over time
FAQ
Yes, cotton, acrylic, or wool all work; just match your hook size to your yarn.
Stuff lightly at first, then gradually fill until she is firm but not stretched.
Yes. A larger hook and thicker yarn create a bigger bunny, while smaller yarn and hook make a mini version.

More Crafts You Might Like To Try
More Easy Patterns For You To Try
Looking for more patterns like this? Why not try one of these:


Stay Connected
Made this pattern? Let us know how it went in the comments below!
Pin this post - Pin now to take your paper crafting skills to the next level.
Share on Instagram or Facebook - Capture the beauty of your finished project and share it on Instagram or Facebook! Tag us @armchaircrafts so we can see your work!