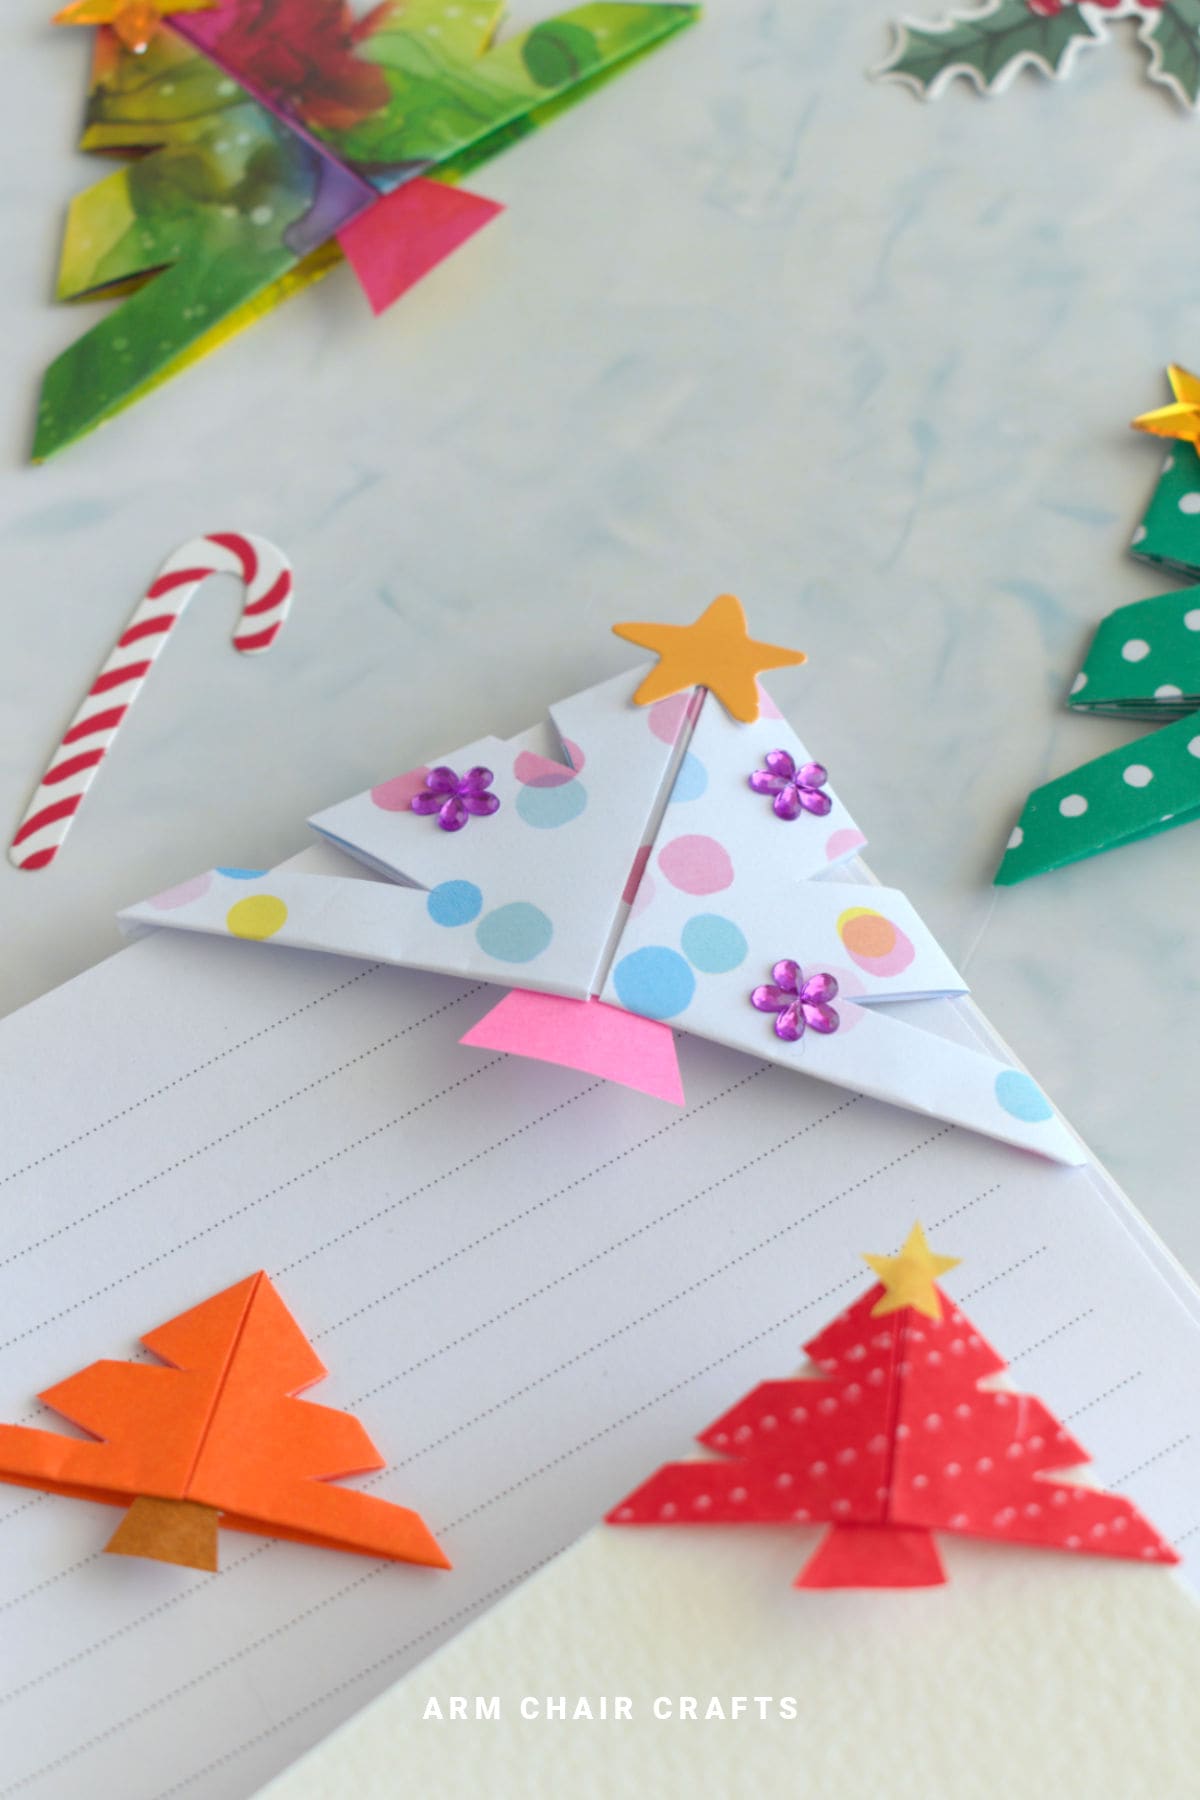
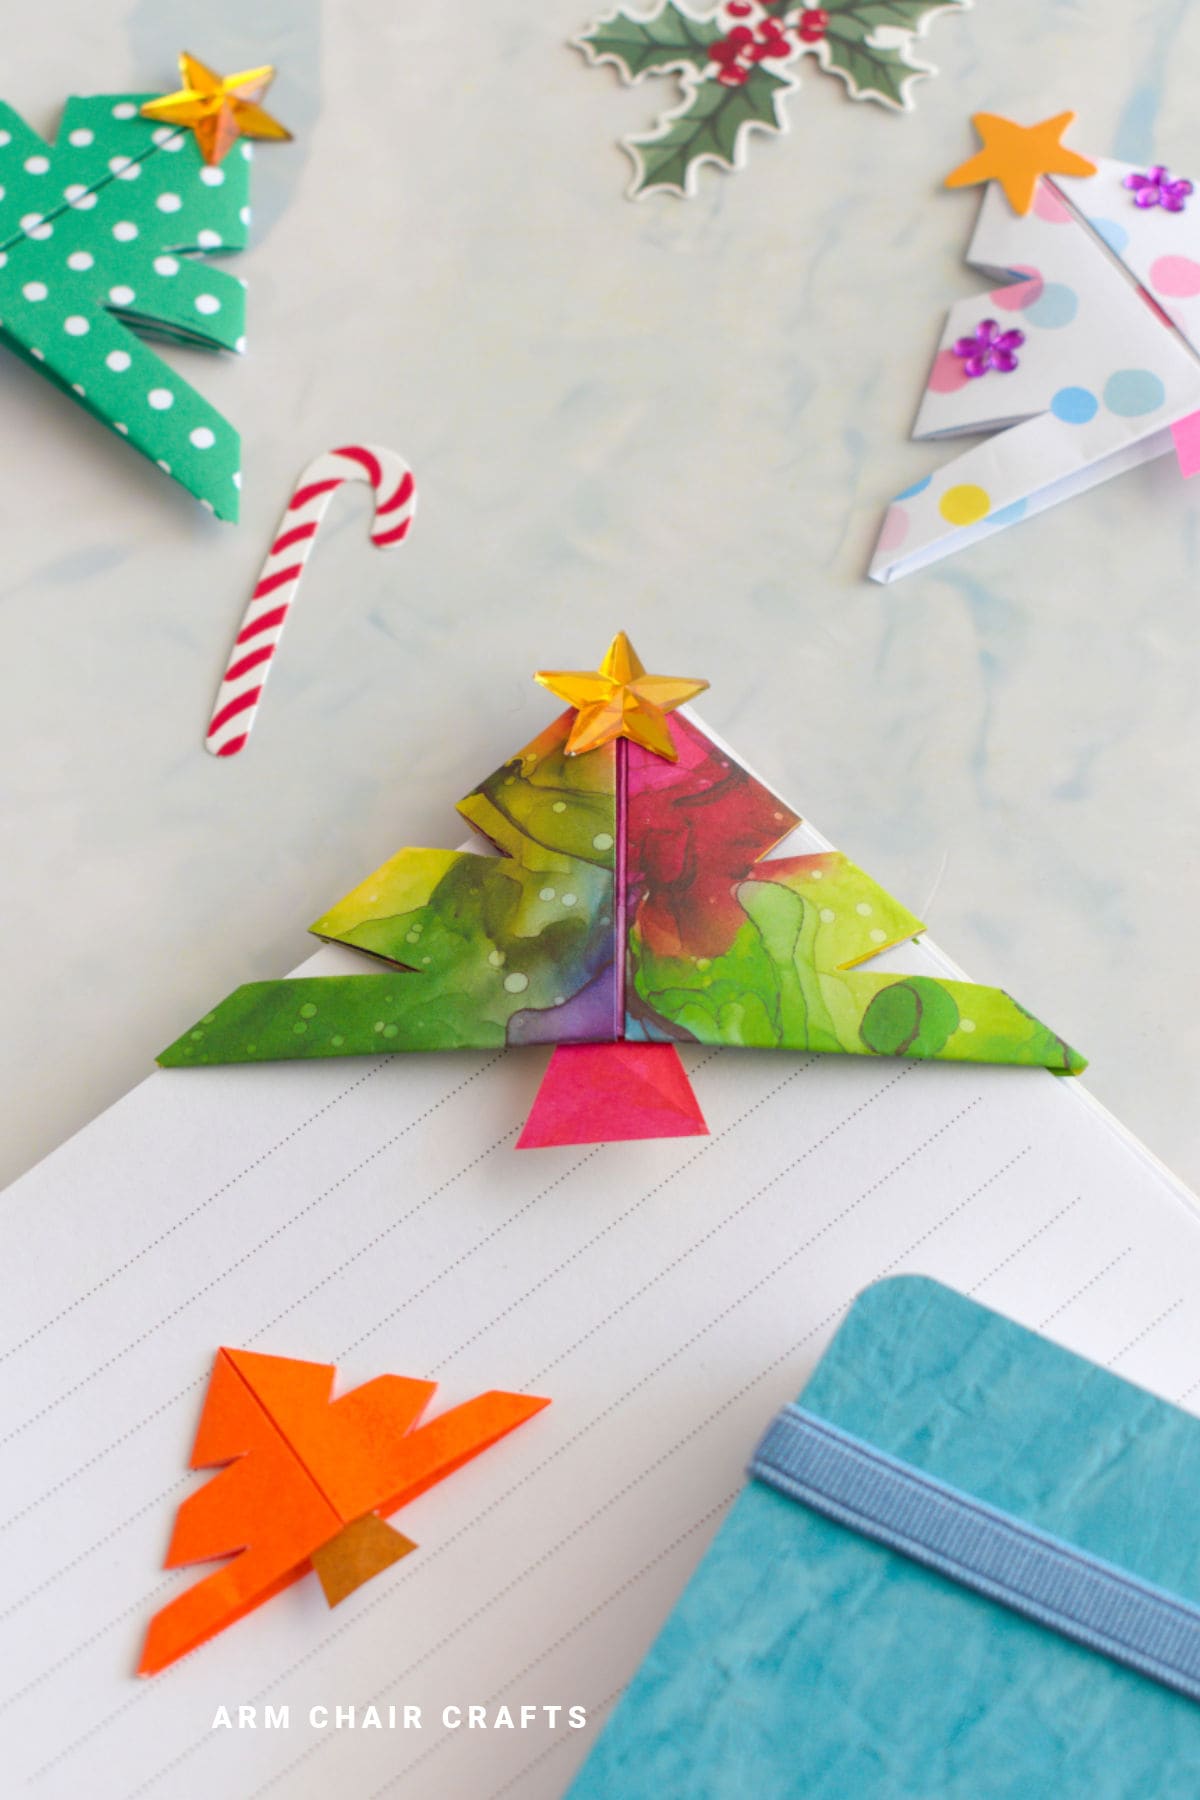
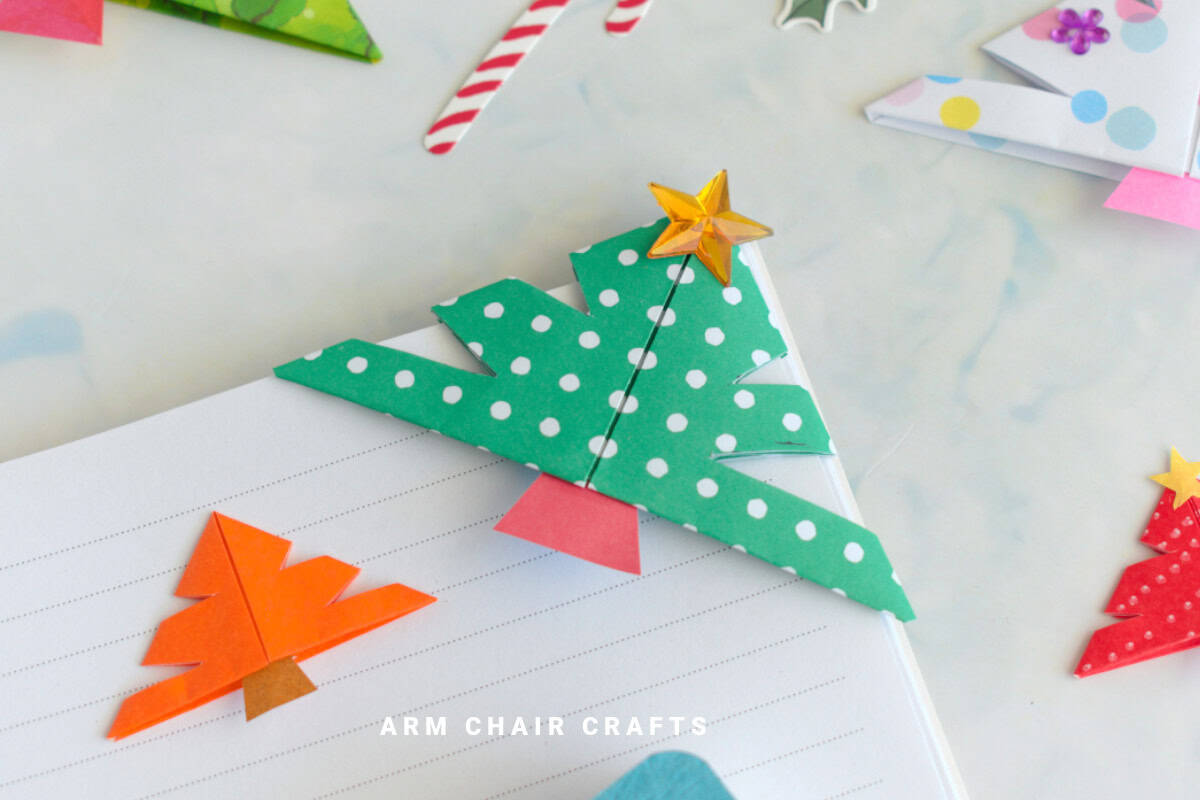
This Christmas tree origami corner bookmark is a fun and festive way to mark your pages during the holiday season.
Made with just a square sheet of paper and a small piece for the trunk, it's a cute Christmas craft that's both practical and decorative.
Jump to:
If you're looking for a simple holiday paper craft that's also useful, this christmas tree origami corner bookmark is a perfect choice.
It slides neatly onto the corner of your page and transforms into a little Christmas tree that peeks out from your book.
It's ideal for kids, teens, teachers, and anyone who loves festive stationery.
This project is great for Christmas crafting, classroom activities, holiday gifts, and stocking fillers.
You can make a whole set in different shades of green, decorate them with markers or stickers, and even add tiny glitter accents for a magical seasonal touch.
Because it only uses basic materials, it's also a lovely last-minute Christmas craft idea.

Why You'll Love This Pattern
- A practical bookmark with festive Christmas charm
- Quick and beginner-friendly origami project
- Great for kids' crafts, classrooms, and holiday crafting sessions
- Customizable with decorations, patterns, and colors
- Makes a sweet handmade Christmas gift or stocking stuffer
Materials Needed
- 1 square sheet of paper (green works beautifully, but any color is fine).
- Small piece of paper for the tree trunk
- Pencil
- Glue
- Scissors
Note: a Christmas tree corner origami bookmark made with 6 inch (15 cm) square paper for the tree will make a bookmark that is about 4 inches long x 2 inches tall (10 cm x 5 cm).
Instructions
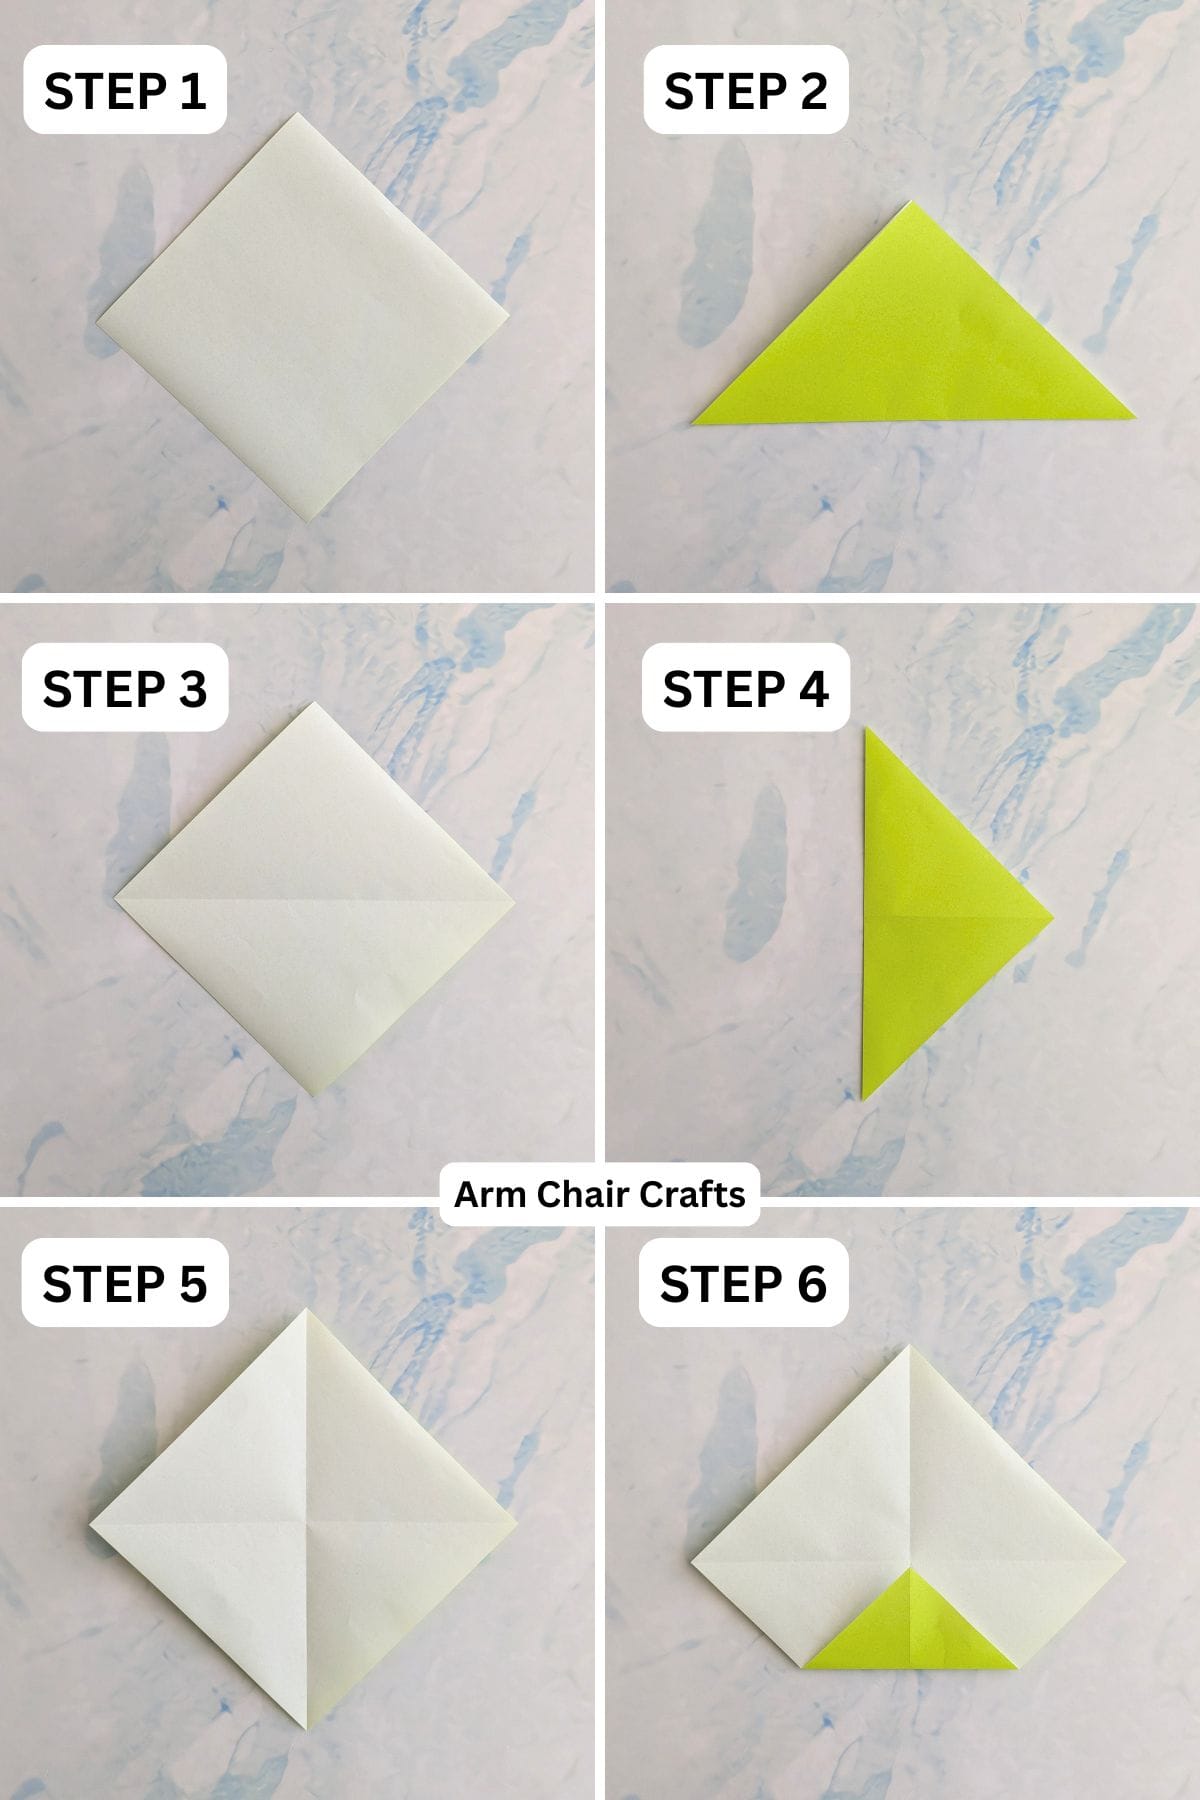
Step 1: Using your large square sheet of origami paper. Start with the color you want your Christmas tree bookmark to be facing down. Arrange your paper to sit like a diamond shape.
Step 2: Fold the bottom point up to meet the top point.
Step 3: Unfold previous step.
Step 4: Fold the left point to meet the right point.
Step 5: Unfold previous step.
Step 6: Fold the bottom point up to meet the middle point.
You're almost there!
To unlock the final steps and complete your pattern, create a free account with Grow.me. below.
Make sure you tick the box to subscribe to our newsletter and stay up to date with the latest patterns, tips, and more!
Once you're signed up, you'll get instant access to finish your project and enjoy exclusive content in the future.
Already signed up? Hit the button below and select 'Switch to Log In' to pick up where you left off and finish your project!
Step 7: Fold the bottom edge up along the existing centre crease.
Step 8: Fold the bottom left point up to meet the top point.
Step 9: Next, you will be working into the pocket of the paper. Tuck the top left point (which you folded up in the previous step) into the pocket as shown.
Step 10: Now, we will work on the right side. Fold the bottom right point up to meet the top point.
Step 11: Like we did for the left side, now tuck the top right point into the pocket.
Step 12: Next, fold the top point down to meet the bottom.

Step 13: Tuck the top point (that you folded down in the previous step) into the pocket.
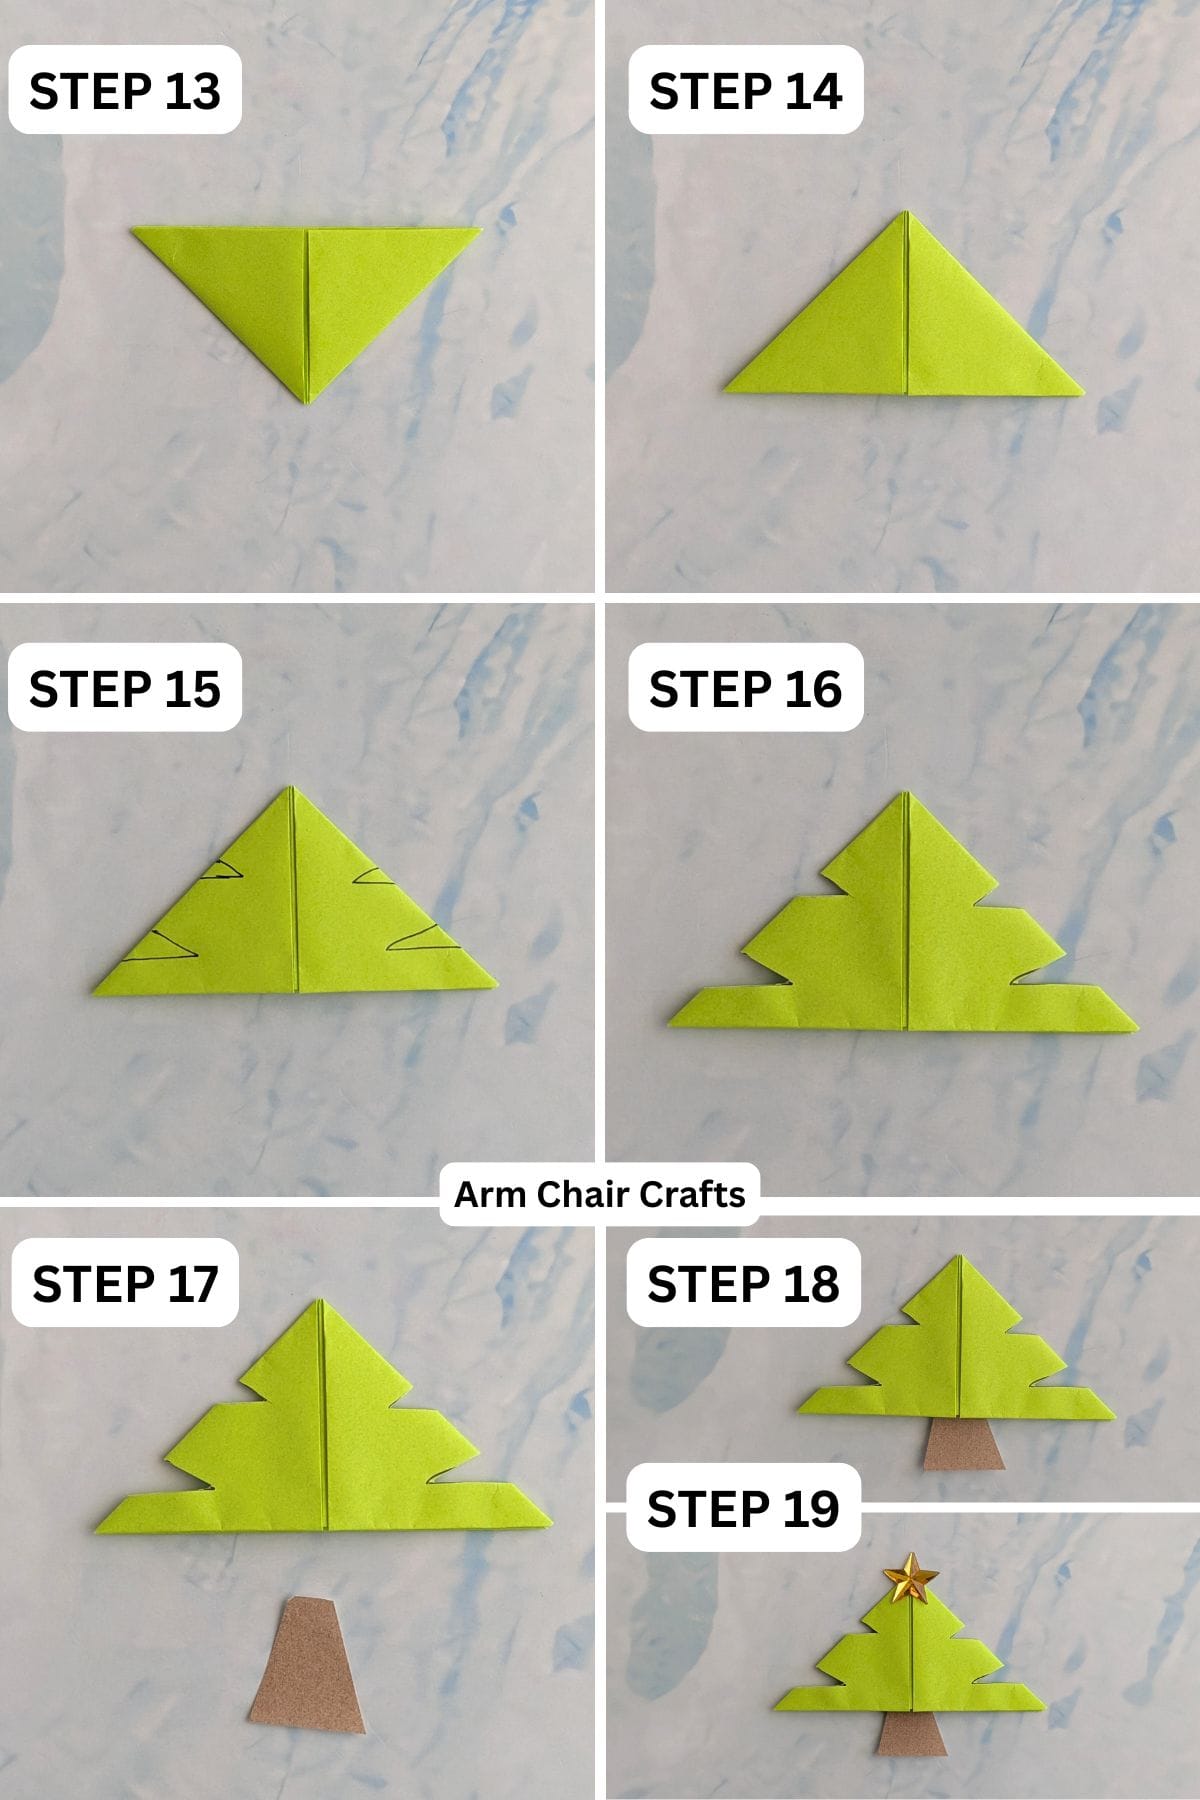
Step 14: Rotate your paper so that the point is on the top.
Step 15: Using a pencil, draw some markings on the triangle as shown. Try to keep the markings as symmetrical as possible.
Step 16: Cut along the markings you made in the previous step. You have now made the branches of the Christmas tree.
Step 17: Using your small piece of paper, cut out a small shape for the trunk of the tree. Tip: Make it a little longer and bigger than you actually want the trunk to be. This is because you will be gluing the trunk to the inside of the triangle in the next step.
Step 18: Apply some glue or double sided tape to the top of the trunk and attach it to the inside of the triangle (on the top edge only).
Step 19: Decorate your Christmas tree origami bookmark as you like. Completed origami corner bookmark.
Tips For Success
- Use double-sided paper for a more polished tree look.
- Keep the trunk small so it doesn't weigh down the bookmark.
- Flat, crisp folds help the bookmark sit neatly on your page.
Color, Paper Ideas, and Variations
Classic green paper gives a traditional holiday look, but patterned Christmas paper adds extra charm.
You can decorate your tree with tiny drawn ornaments, stars, or dots using metallic markers.
Light pastel shades also work beautifully for a softer, modern Christmas theme.
FAQ
You could use these cute origami corner bookmarks as stocking fillers and small handmade gifts, for holiday crafting sessions, party favors for Christmas gatherings, and more!
Stay Connected
Made this pattern? Let us know how it went in the comments below!
Pin this post - Pin now to take your paper crafting skills to the next level.
Share on Instagram or Facebook - Capture the beauty of your finished paper craft project and share it on Instagram or Facebook! Tag us @armchaircrafts so we can see your work!